Dress up your end table with this decorative tile planter. Quick and easy assembly - this one is a breeze. Show your personality by using patterned tiles or spray paint for a pop of color.
TOOLS USED
18V ONE+™ Cordless Mini Glue Gun
18V ONE+™ Lithium+ 2.0Ah Battery and 2.0A Charger Kit
MATERIALS USED
(5) Square tiles
Glue sticks
Painter
Spray paint
STEP 1
Place glue stick in glue gun and let it heat up
STEP 2
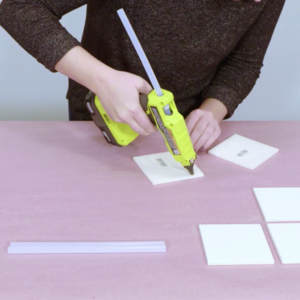
Start with 1 tile, smooth side down. Inside the square, line one side with glue. Take another tile, (smooth side facing out) and line up the edge perpendicular to the first tile. Set it in a line of glue, hold for 20 seconds and let it dry. Repeat the process for the opposite side
STEP 3
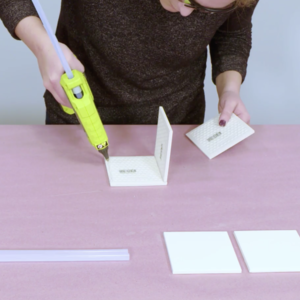
Place glue on both upward tiles and place the 4th tile on top. You now have an open box. Line the bottom with glue and place 5th and final tile to enclose the box.
STEP 4
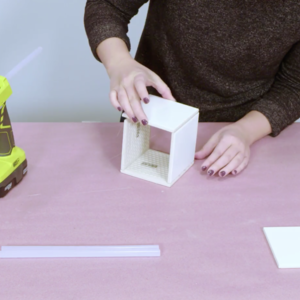
Let the glue dry for 5 minutes before handling.
STEP 5
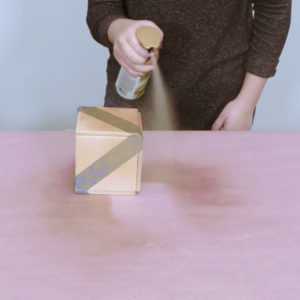
Finish to your liking! Optional - You could adhere painter’s tape to the tiles in a design of your choice. Then spray paint each side and let them dry before removing the painter’s tape to reveal the design. Then fill with potting soil and your favourite plant.
ENJOY!
Don't forget to tag us in your DIY projects on @ryobitoolsuk