This pot stand is not only a simple and easy project, but also one that will add a bit of interest and depth to your potted plants! The only tools you’ll need are a circular saw, a drill and a pocket hole drill guide!
TOOLS USED
18V ONE+™ HP Compact Cordless Brushless Drill Driver
18V ONE+™ HP Cordless Brushless Performance Circular Saw
16 oz / 450g Framming Hammer
MATERIALS USED
244cm x 47mm x 50mm piece of wood (pine, redwood, or whatever you prefer)
Pocket hole screws
Spray Urethane or similar oil based wood preservative
Wood glue
STEP 1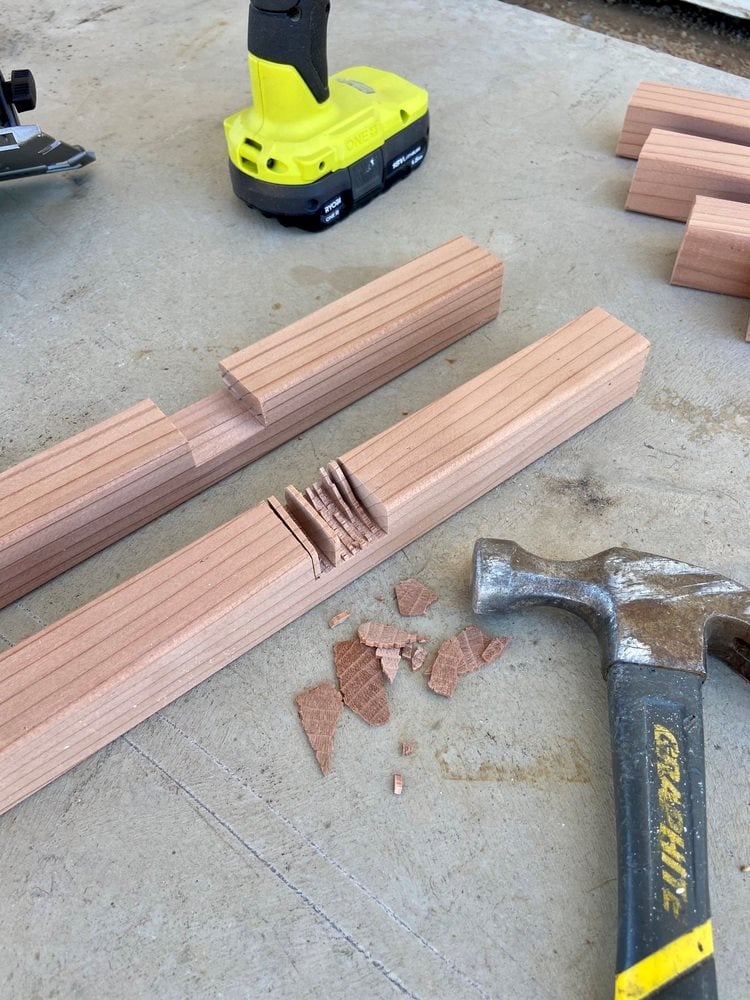
Begin by cutting your 47mm x 50mm material into 2 pieces approx. 26cm in length. These will make the center part of the stand. And 4 leg pieces approx. 36cm in length. NOTE: the 4 leg pieces can be longer or shorter depending on your preference.
STEP 2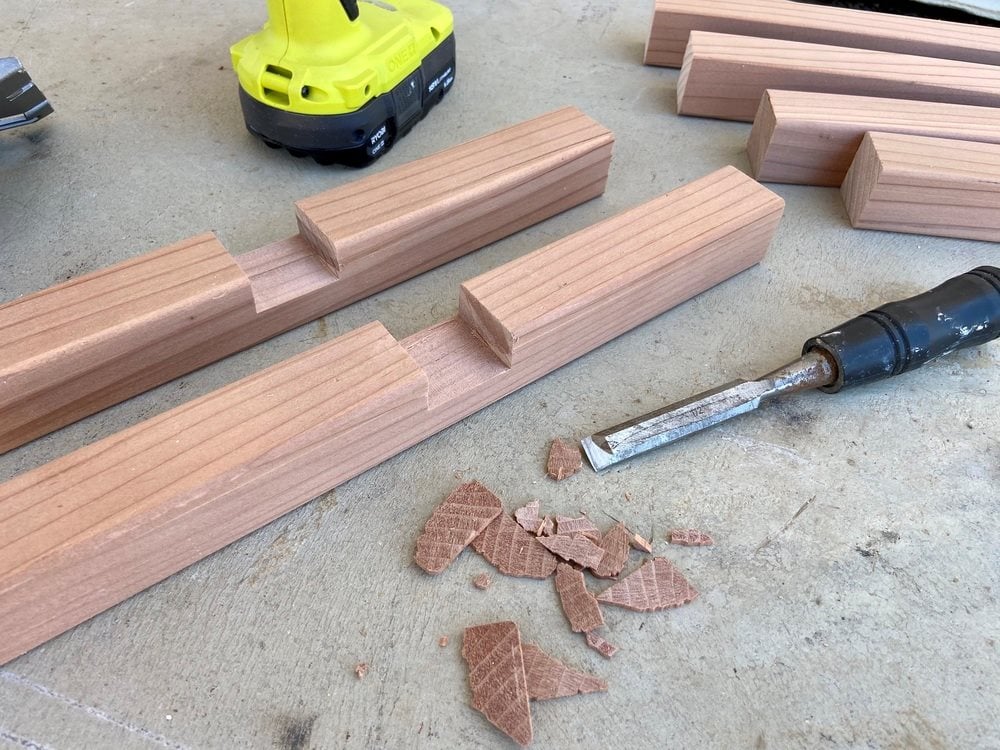
Align your two 26cm pieces and mark out a section of approx 3.8cm in the center to be cut. From center this will be approx. 1.9cm in each direction.
STEP 3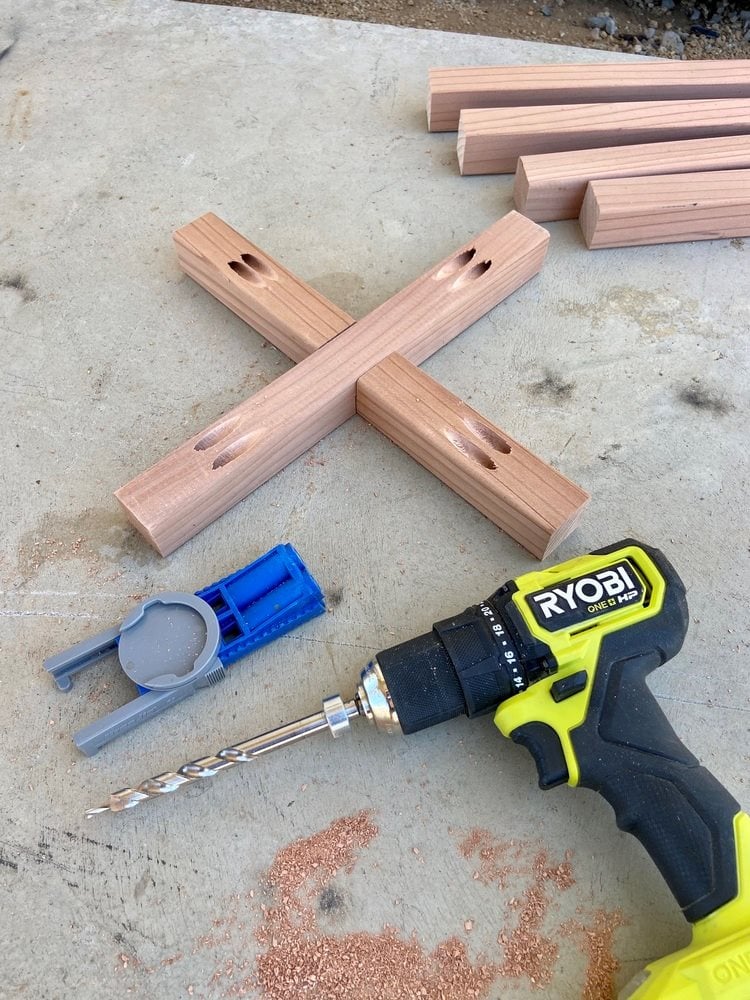
Now set the depth of your circular saw at just 1.9cm. Using the saw make several cuts in parallel on the ‘marked’ sections on your 26cm pieces. (This is from step 1)
STEP 4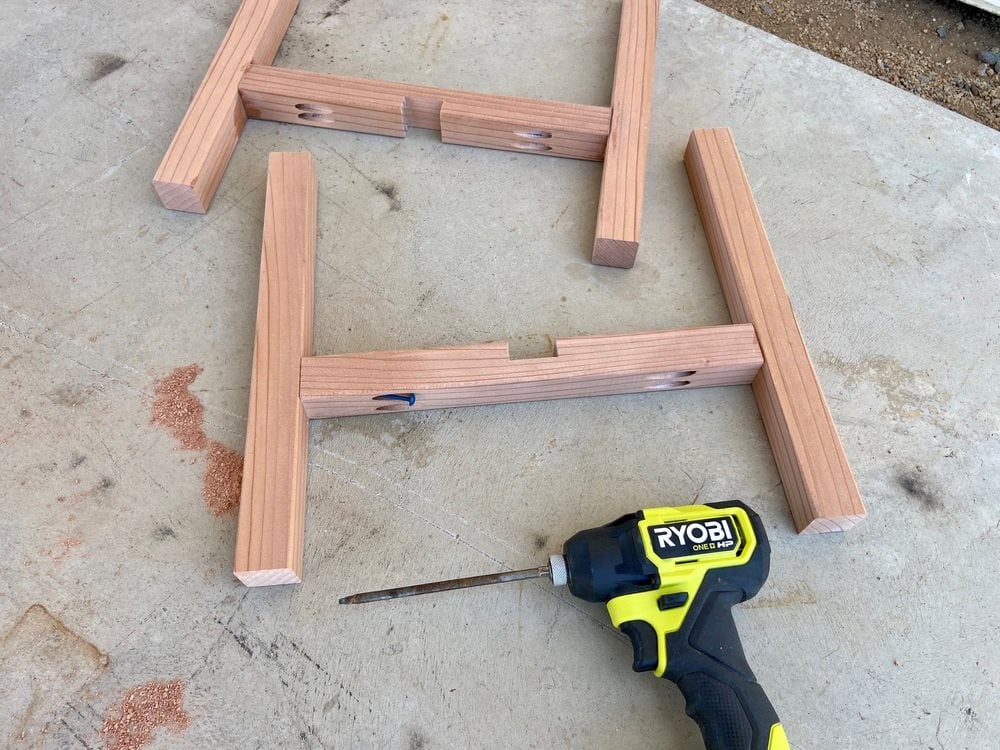
Knock out the thin material in between these cuts to create a half lap joint. This notched area should not be deeper than 1/2 of the material thickness.
STEP 5

Identify the underside of the 26cm pieces after ‘dry fitting’ them together. Drill 2 pocket holes on these under sides and insert your 6.3cm pocket hole screws.
STEP 6
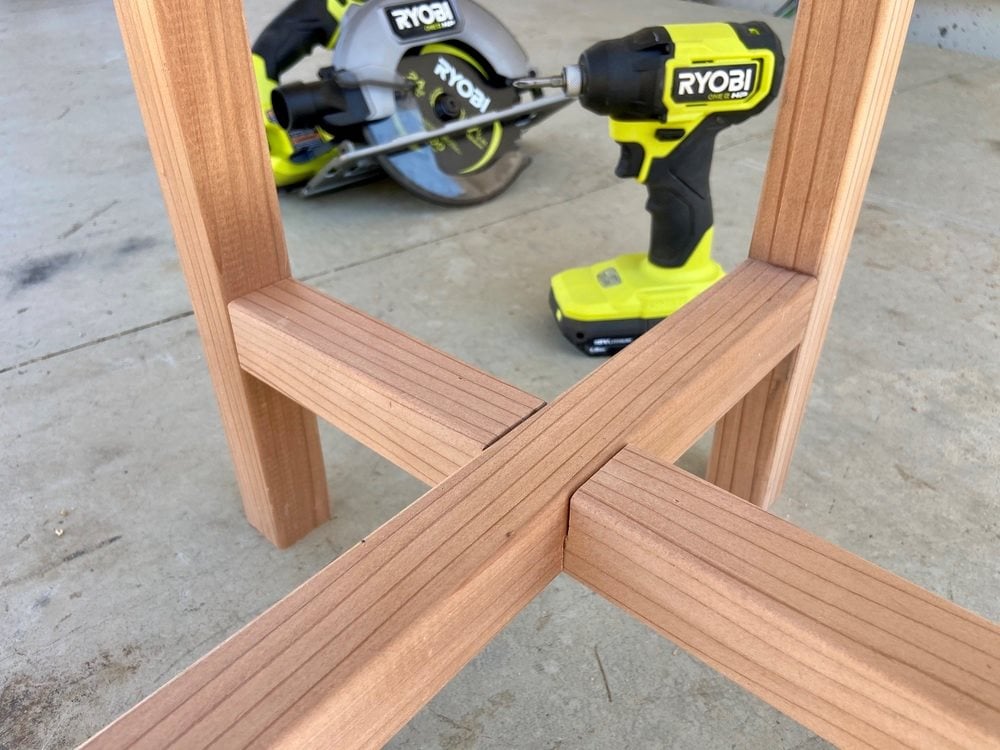
Secure the 26cm pieces to the 36cm ‘leg’ pieces at approx. 11cm from the bottom of each leg. Then align the notches on the 13 3.2mm pieces and secure with glue and screws from the underside (same side as the pocket holes). Finish with a stain, oil based urethane and or linseed oil or a similar preservative treatment. Once dry you’ll be ready to add your potted plant and enjoy!
Don't forget to tag us in your DIY projects on @ryobitoolsuk