Shelves don't need to be boring! Follow this easy step by step guide and make your storage solution both useful and tasteful.
This DIY Decorative Shelf can be made for any room, from bedroom to living room, this art-and-storage-savvy Decorative Shelf can go anywhere!
For this project you will need:
STEP 1
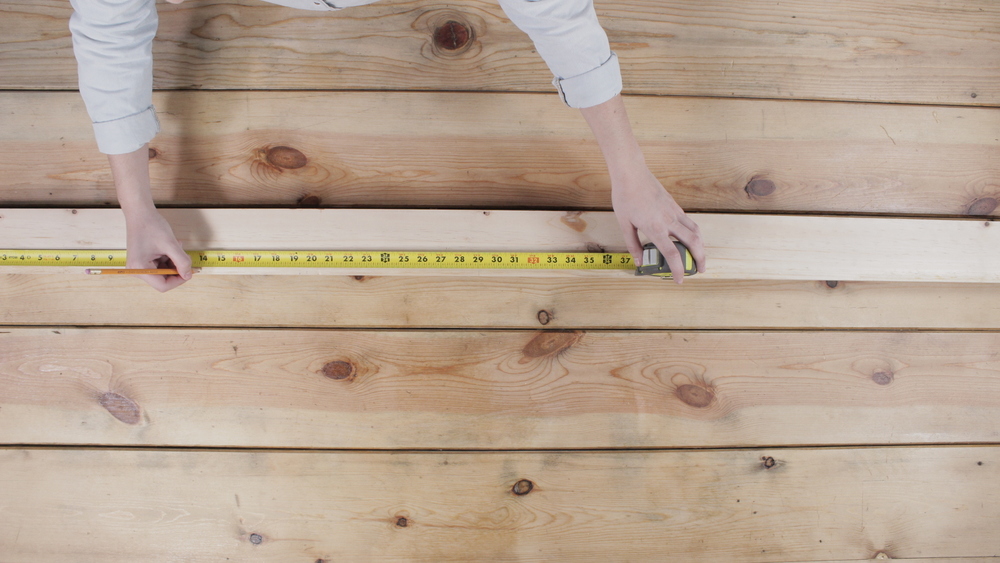
Mark the cuts for your mountain shape on the 1.5cm X 10cm X 2.4m piece of wood.
STEP 2


Adjust the bevel on the circular saw to 45-degrees, and make two cuts of 90 cm, two cuts of 35 cm, two cuts of 25 cm and two cuts of 15 cm.
STEP 3
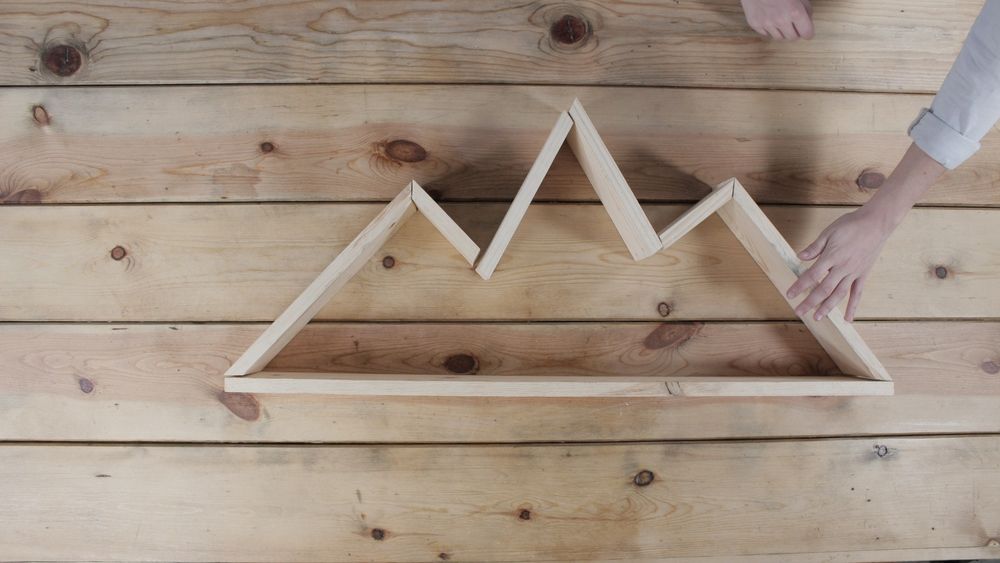
Align your pieces on their edges to shape the peaks of your mountain.
STEP 4

Apply wood glue to the joints, and let dry.
STEP 5

Trace the mountain shape onto your piece of plywood, and cut out with your jigsaw.
STEP 6

To attach the back panel onto the shelf, drill pilot holes and then fasten screws.
STEP 7

Use 220-grit sandpaper to finish the edges of the shelf.
STEP 8

Apply a finish of your choice
STEP 9
Attach brackets to your shelf on each side of the bottom of the shelf on the side you want against the wall.
STEP 10
Before you drill into your wall check there aren't any hidden hazards behind the wall. Then hold the shelf up on the wall, ensure it’s straight using a spirit level and mark the fixing hole positions. Mark the length of your wall plugs on the drill bit using a piece of tape. Drill the holes in the marked positions and gently tap in the wall plugs with a hammer to ensure they’re flush with the wall. Then hold your shelf up and drill it into the wall.
STEP 11
Dress the shelf and enjoy!
Don't forget to tag us in your DIY projects on @ryobitoolsuk