For those of you who have made room in your personal lives for fitness, why not make room in your home for it as well? Create a trendy yoga mat holder for your home in just a few easy steps! Yoga not for you? Good thing this holder doubles as a coat rack as well.
TOOLS USED
18V ONE+™ Cordless 18 Gauge Nailer
18V ONE+™ Cordless Corner Palm Sander
18V ONE+™ HP Cordless Brushless Performance Circular Saw
18V ONE+™ Cordless Mitre Saw
18V ONE+™ Cordless Drill Driver Starter Kit (1 x 2.0Ah)
MATERIALS USED
Small hooks (For hanging purposes)
(2) Large hooks
25mm Brad nails
(1) 19mm x 32mm x 244cm Moulding
(2) 1 x 4 x 185cm
(1) 1/2 Sheet plywood
STEP 1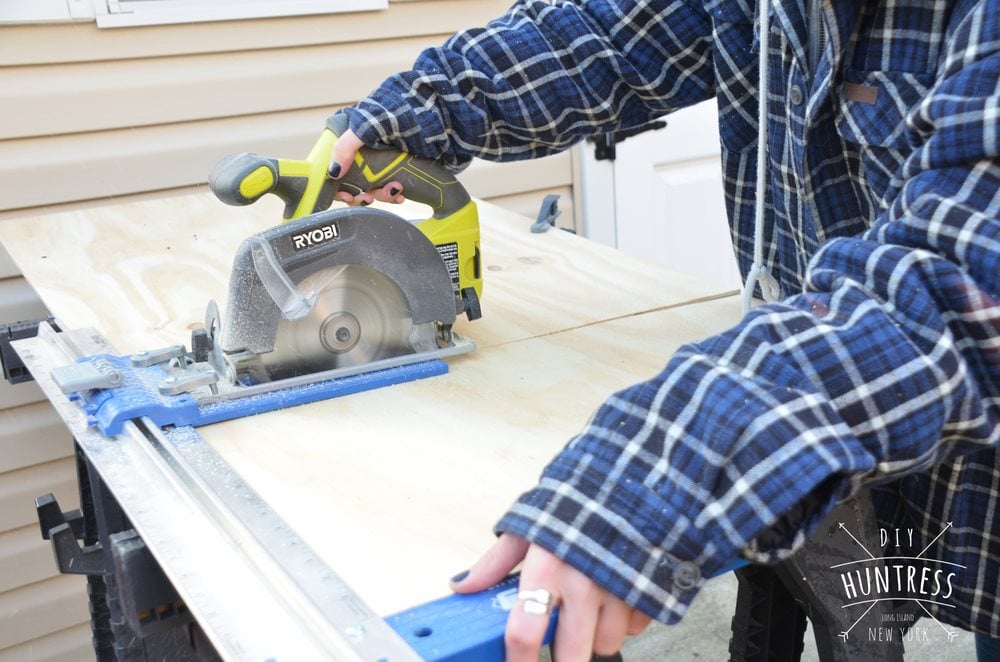 Cut your plywood backing to 37cm x 61cm
STEP 2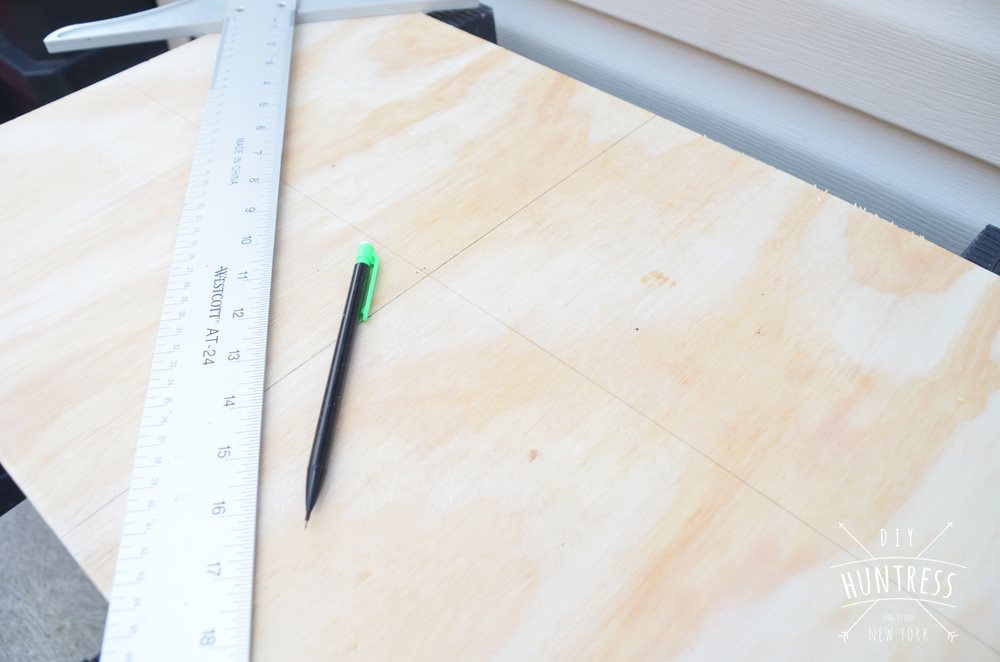 Use a straight edge to find the center of your plywood backing. Create four even rectangles to help map out your design.
STEP 3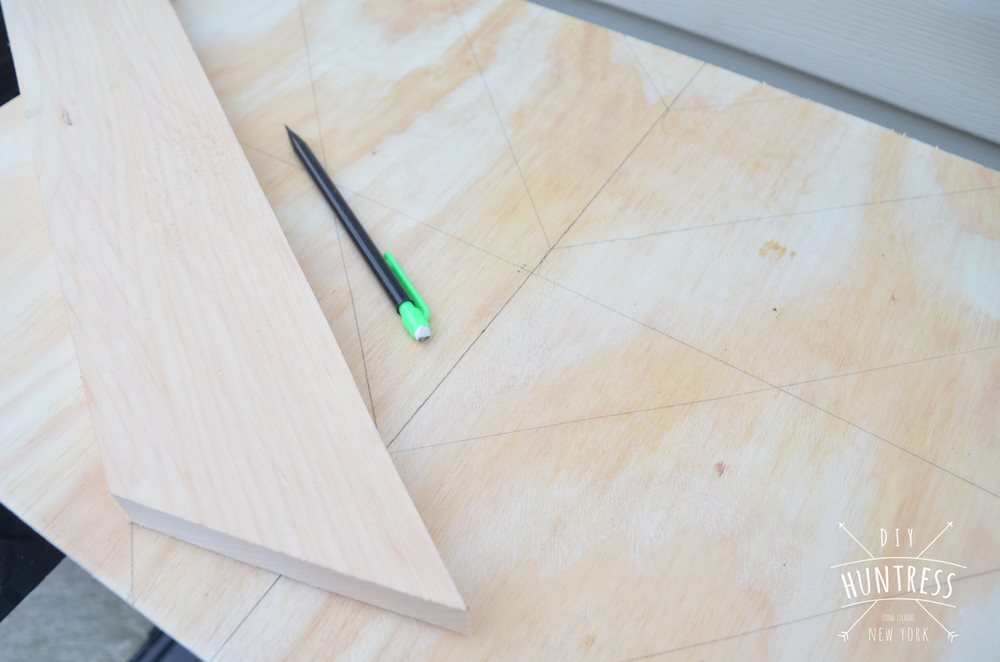 Cut a scrap piece of 1x3 at 45 degrees to use as a stencil for your mat holder. Use this stencil to trace your design.
STEP 4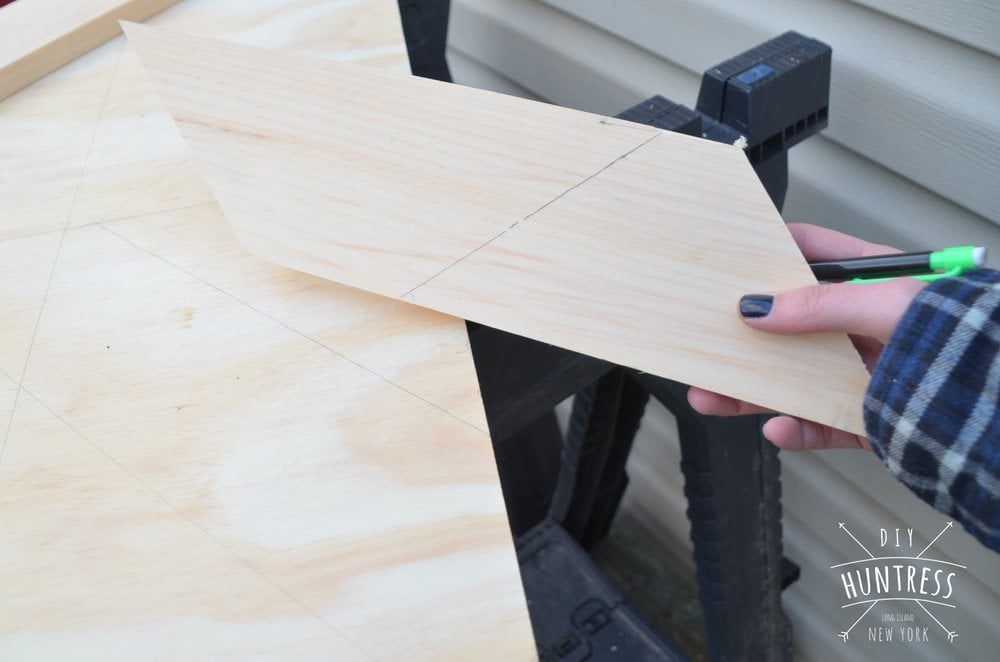 Start each board with a 45 degree cut. Line up each board with the design you traced. Once lined up, use a pencil to trace the cut mark on each board. This will be where the 1x3 overhangs the plywood backing.
STEP 5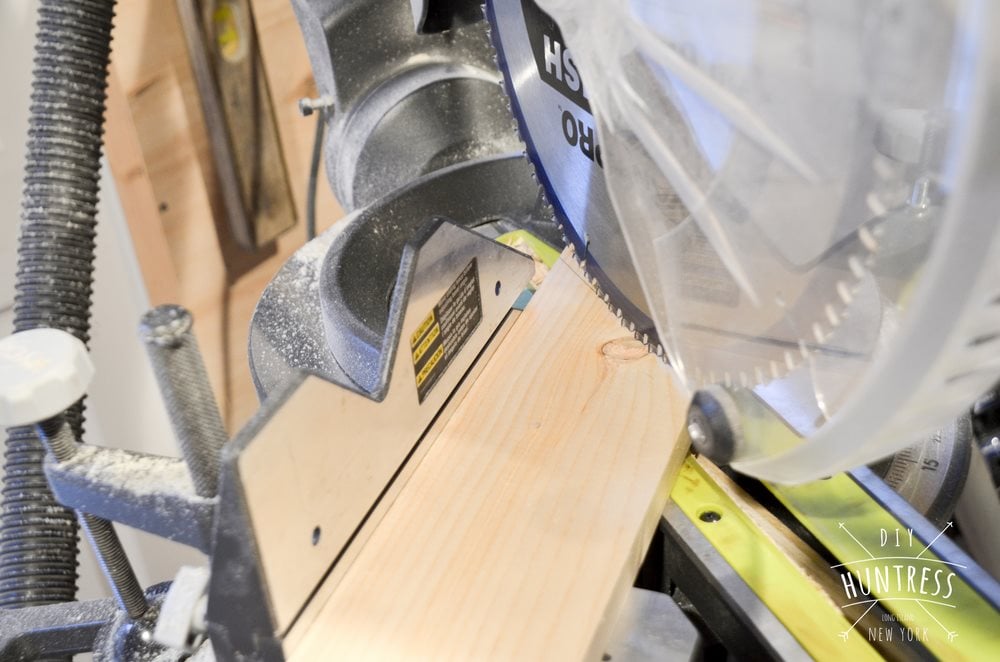 Cut your 1x3's on the cut lines. All cuts will be made at 45 degrees.
STEP 6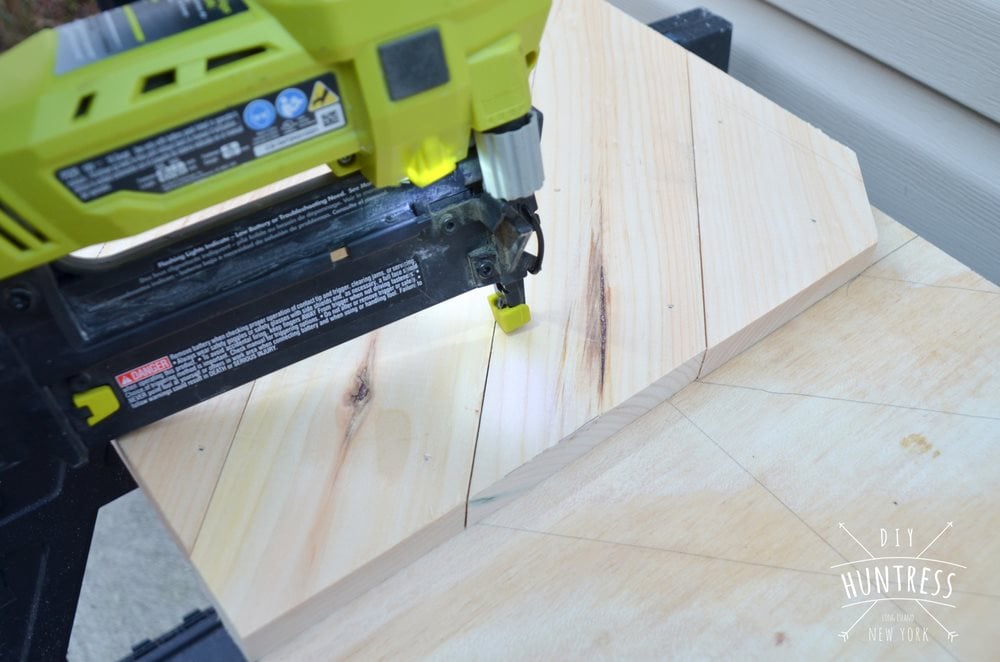 Attach all 1x3 boards with a brad nailer and 2.5cm nails.
STEP 7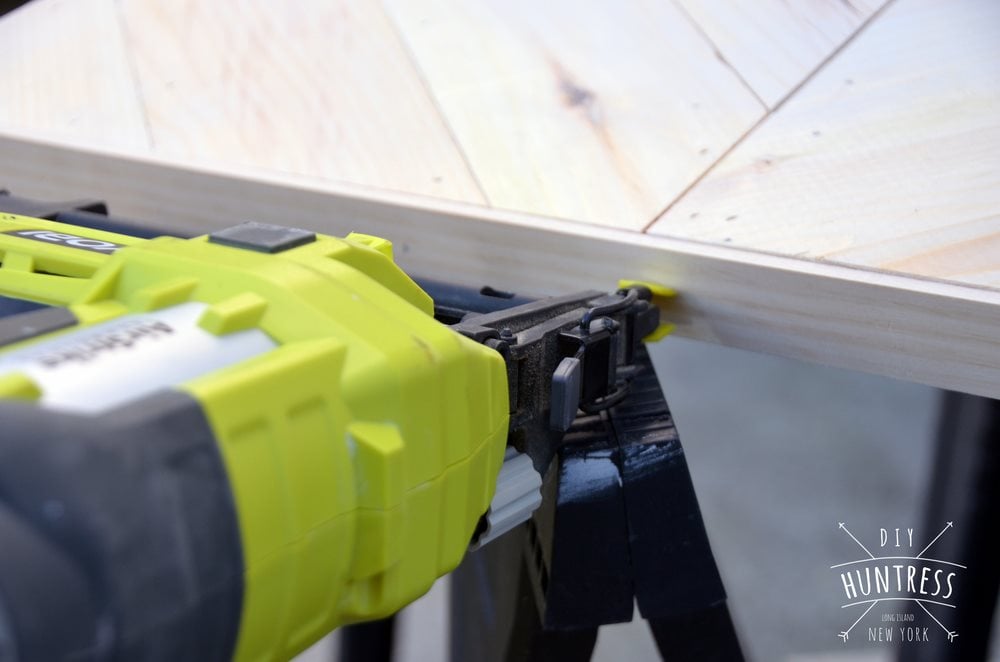 Cut four pieces for your border (2 long edges @ 61cm and 2 short edges @ 39cm). Attach them to the mat holder with a brad nailer and 2.5cm nails.
STEP 8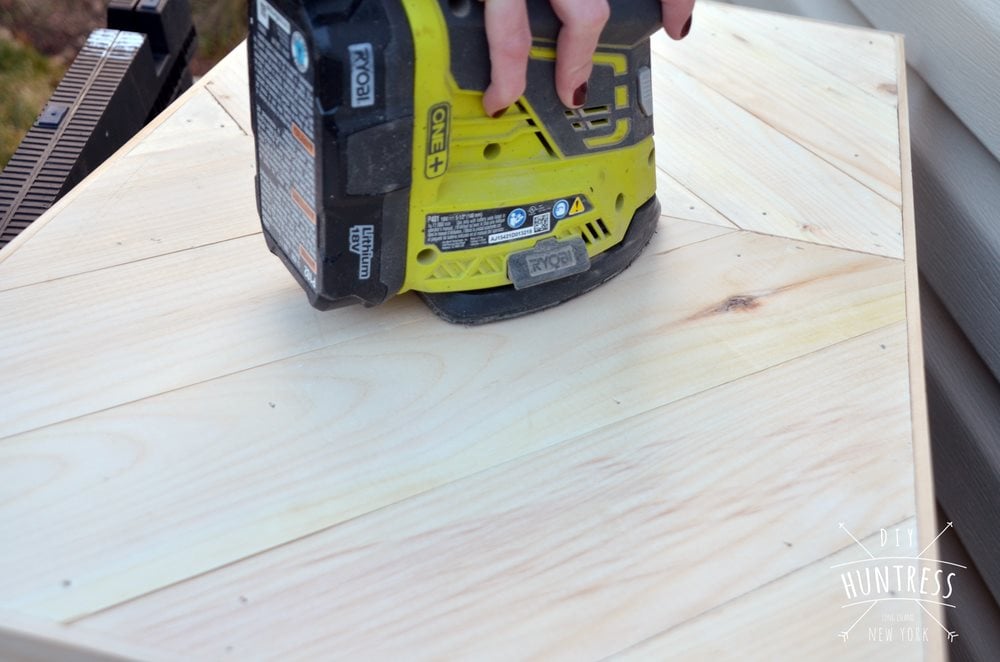 Sand & stain your piece.
STEP 9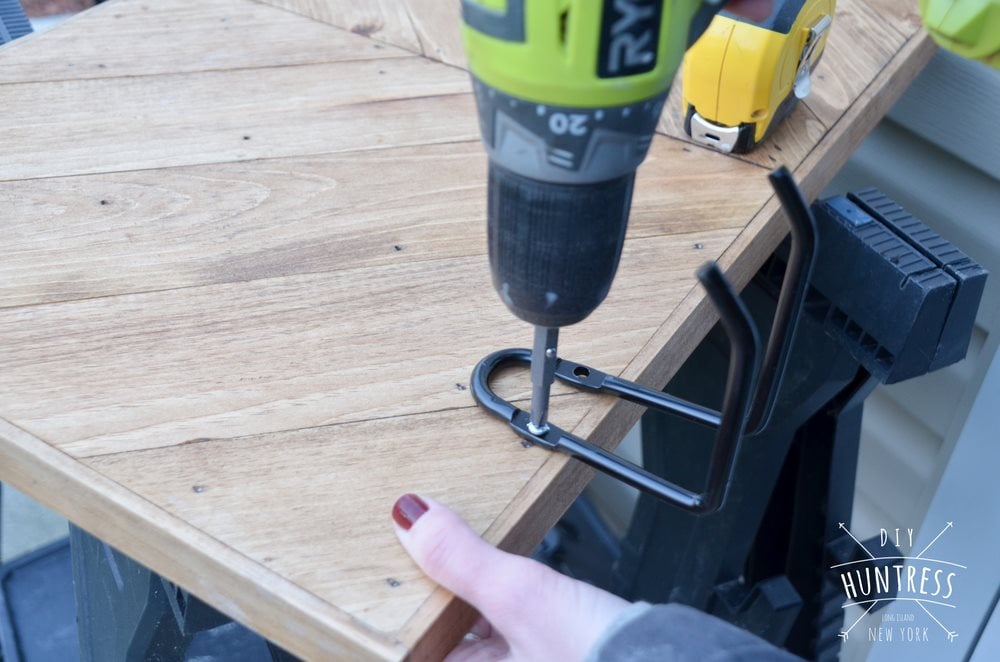 Attach large hooks on the front for the mat and small hooks on the back for hanging.
STEP 10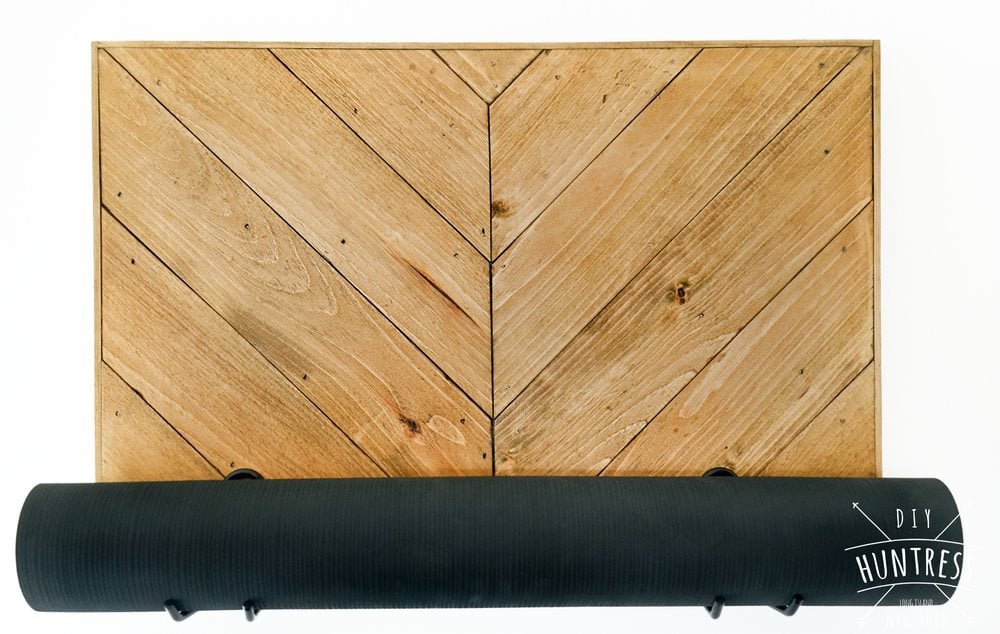
Hang your mat!
Don't forget to tag us in your DIY projects on @ryobitoolsuk