Keep a year round vertical garden to enjoy right there in your own kitchen! This DIY Vertical Wall Planter is perfect for growing lettuce, herbs, wheatgrass, and even certain sprouts! Improve your family's health, incorporate tasty home-grown herbs, and decorate your kitchen wall all with the same beautiful project.
TOOLS USED:
18V ONE+™ Cordless 16 Gauge Nailer
18V ONE+™ Cordless Palm Sander
18V ONE+™ HP Compact Cordless Brushless Drill Driver
18V ONE+™ Cordless Mitre Saw
MATERIALS USED:
Wooden board 2.5cm x 20.3cm X 8
Wooden board 2.5cm x 5cm X 8
19mm wood screws
Waterproof plastic
Burlap roll
Stainable wood filler
Keyhole hangers
Wood stain
Wooden board 2.5cm x 5cm X 8
Wooden board 2.5cm x 20.3cm X 8
STEP 1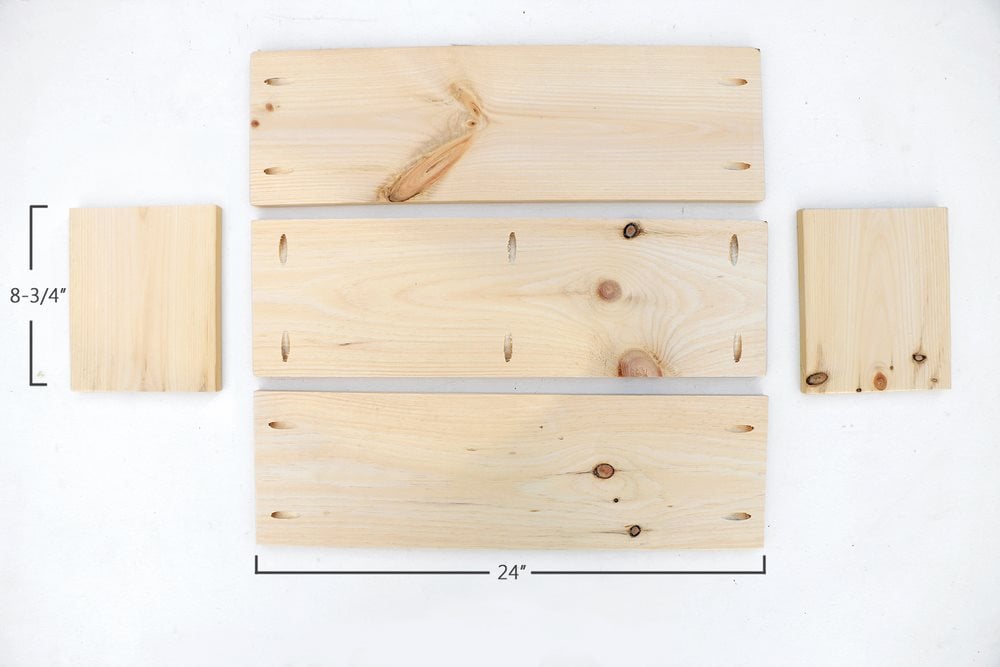
Start by drilling pocket holes in each 61cm board. Two boards should have holes drilled in either end (2 pocket holes each end). One board should have 3 pocket holes drilled on the long sides of the board (3 pocket holes each side). Sand any rough edges.
STEP 2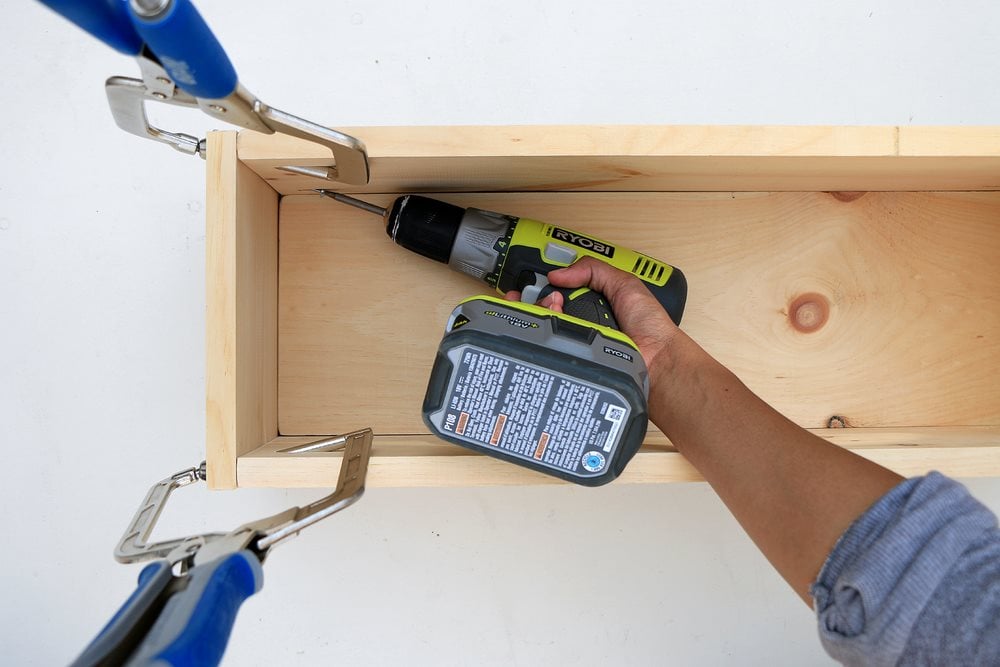
Assemble your planter by placing all the pieces together (the bottom piece should have pocket holes facing down), and clamping the end boards together. Screw the pieces together using 19mm screws via the pocket holes.
STEP 3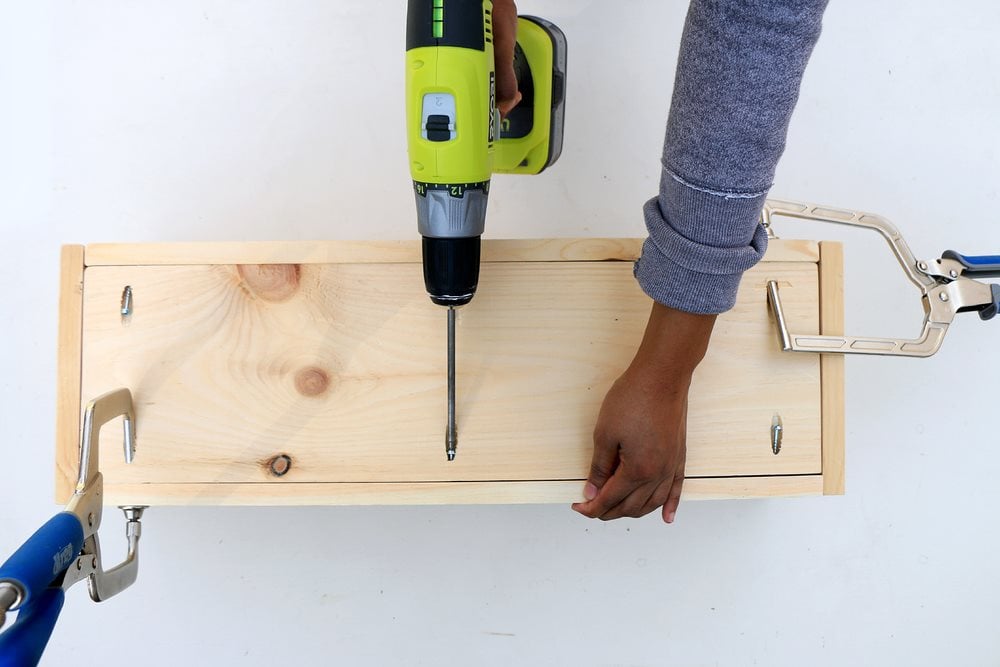
Carefully flip the planter over and clamp and screw the bottom into place via pocket holes.
STEP 4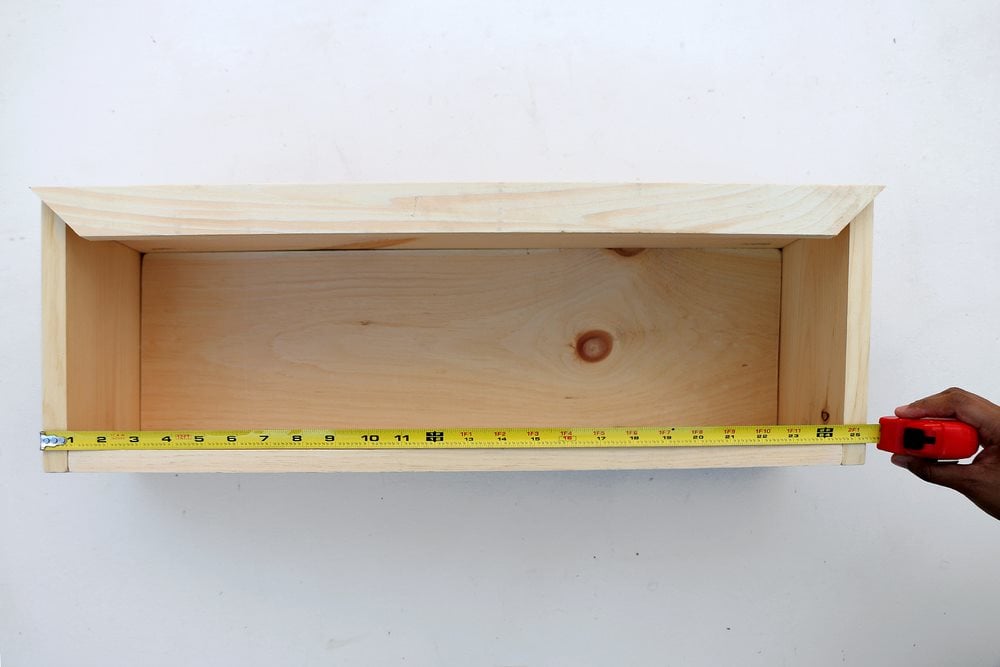 Cut the 2.5cm x 5cm trim pieces at a 45° angle. From tip to tip, the cut pieces will be the same size as each side of your planter box. Place each trim piece atop your planter box to double check the fit.
STEP 5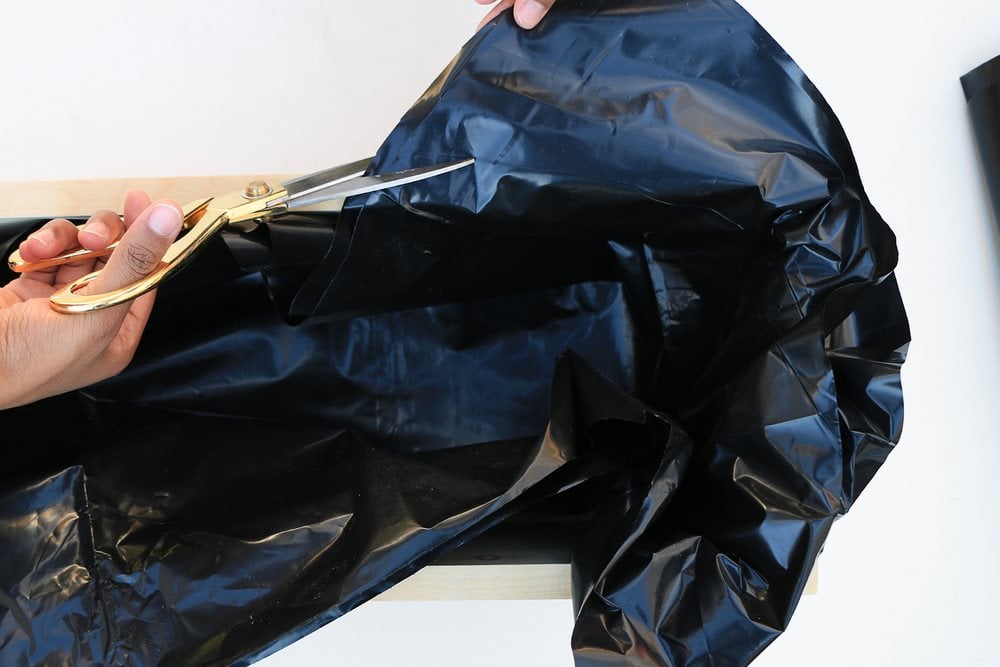 Cut a piece of heavy duty plastic to fit the inside of the planter, and slightly overhang. Trim any excess plastic.
STEP 6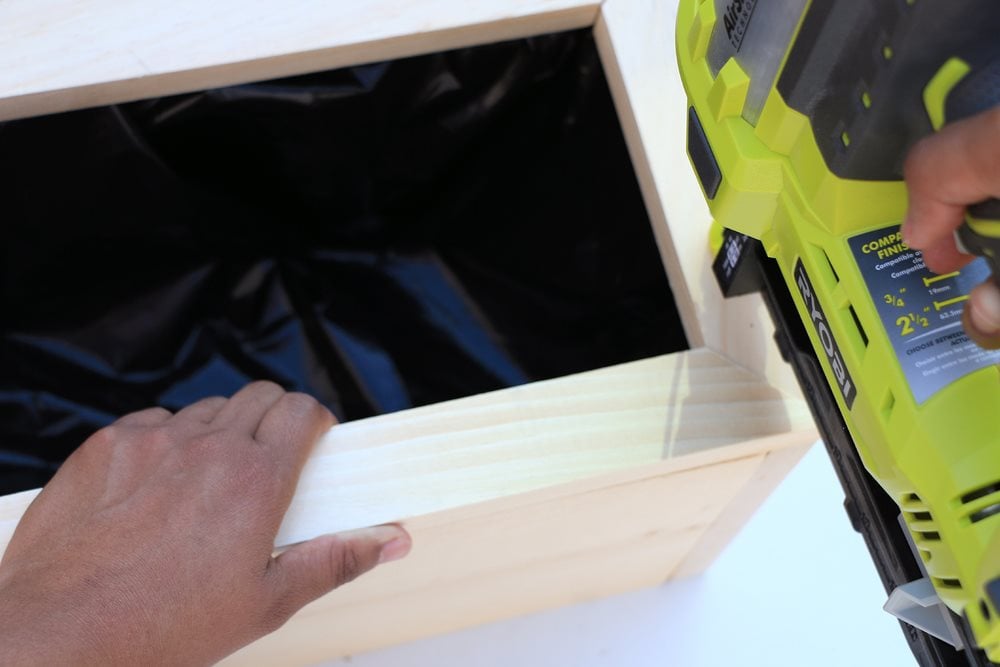
Cut a piece of heavy duty plastic to fit the inside of the planter, and slightly overhang. Trim any excess plastic.
STEP 7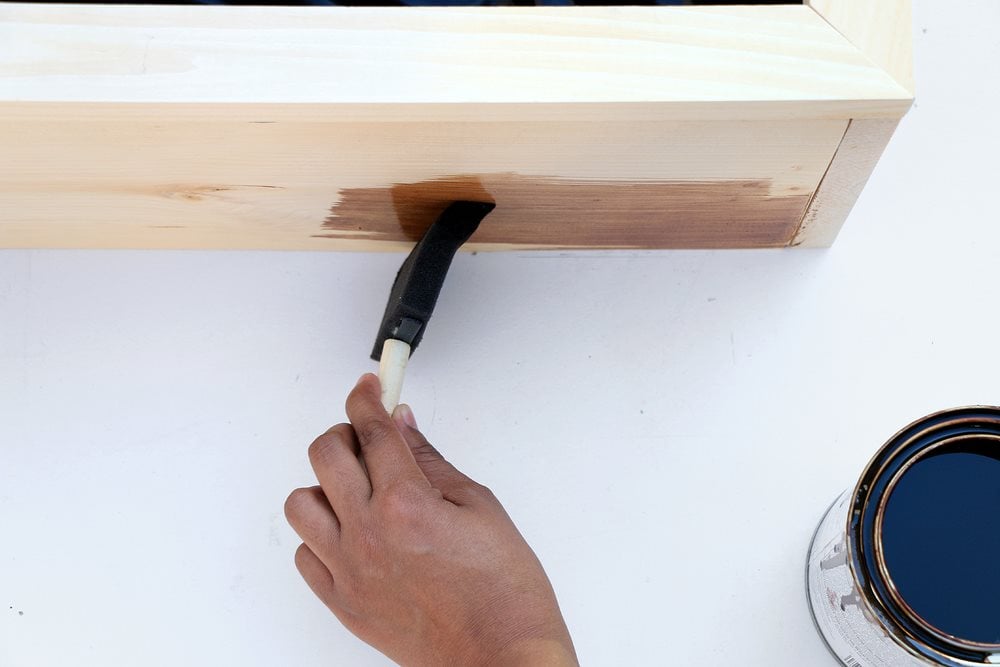
Stain (or paint) your planter box and follow the proper drying times indicated on the can between coats.
STEP 8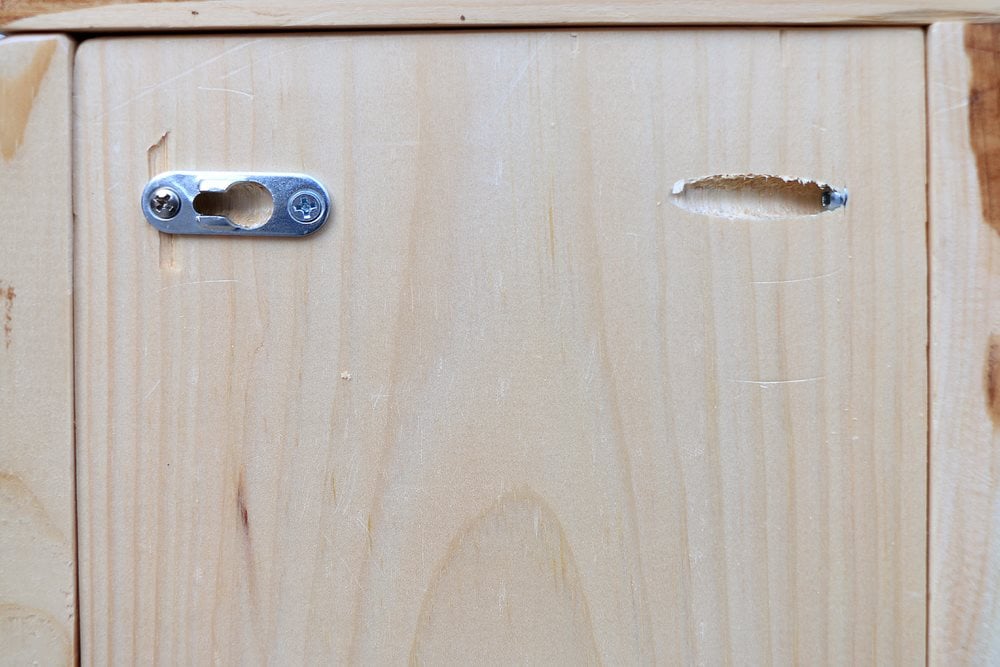 Install keyhole hangers over the drilled pocket holes on the back of the planter.
STEP 9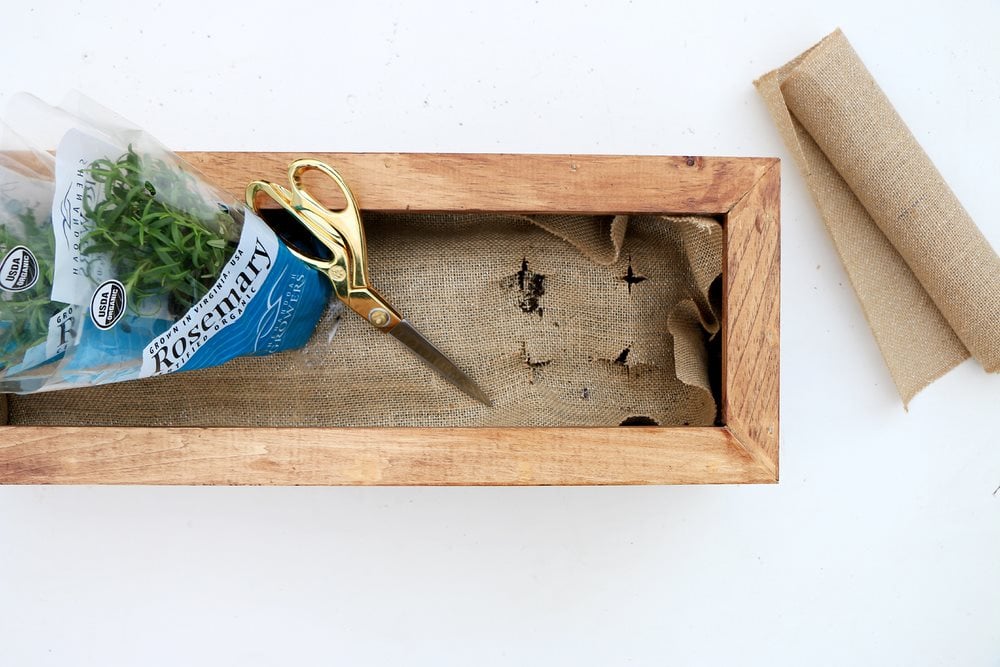 Fill your planter with hard packed garden soil, then place the burlap over top. Cut slits where you will plants seeds or herb plants, then staple the burlap in place.
STEP 10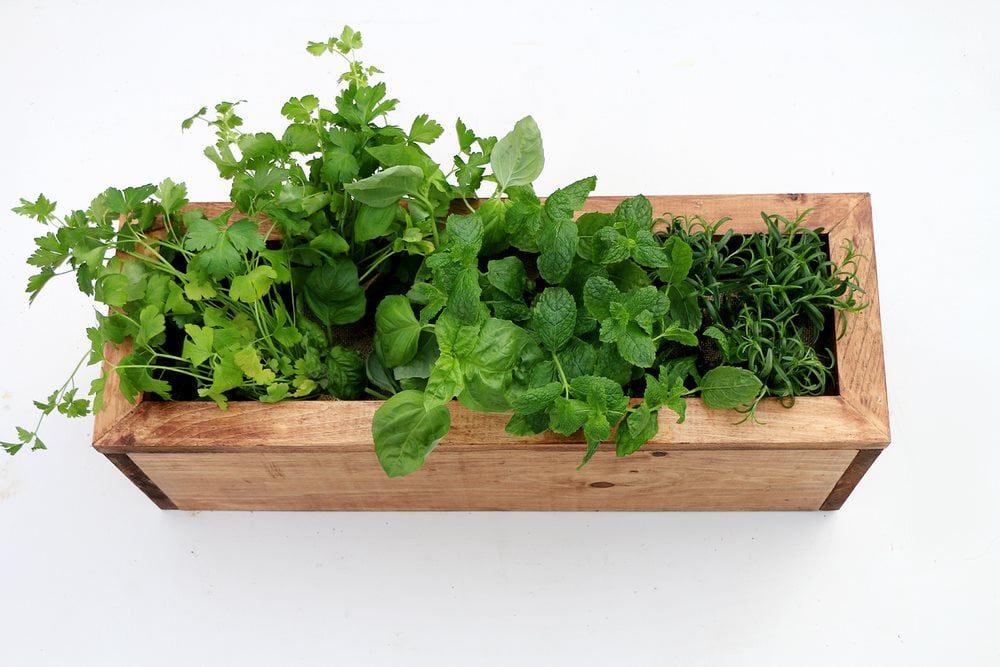 Your new planter is ready to be hung on the wall! Get creative with your planter, make a trio to hang together, or alter the size to create longer or larger planter as usable wall art!
ENJOY!
Don't forget to tag us in your DIY projects on @ryobitoolsuk
Credit given: https://nation.ryobitools.com/nation/members/shanty2chic