In this tutorial you will learn how to make a Four In a Row garden game. This is a fun project that is built out of basic wood and supplies you can get at your local DIY store. You can add an extra fun touch to event games such as BBQs & garden parties to create unforgettable moments. The kids will enjoy this game and play outside for hours!
This Four in a Row game is created similar to the smaller version you can buy in the stores. Simply insert the discs until a player has four disks in a row in any direction.
Materials used
7.6cm wood screws
Hinges and latch
30cm X 5cm by 2.4m long board
Wood stain or paint
60cm X 10cm Boards
120cm X 20cm sheet of 6.5mm plywood
120cm X 20cm sheet of 13mm plywood
Tools used
18V ONE+™ Cordless Random Orbit Sander
18V ONE+™ Cordless 18 Gauge Nailer
18V ONE+™ Cordless 150mm Circular Saw
18V ONE+™ Cordless Drill Driver Starter Kit
STEP 1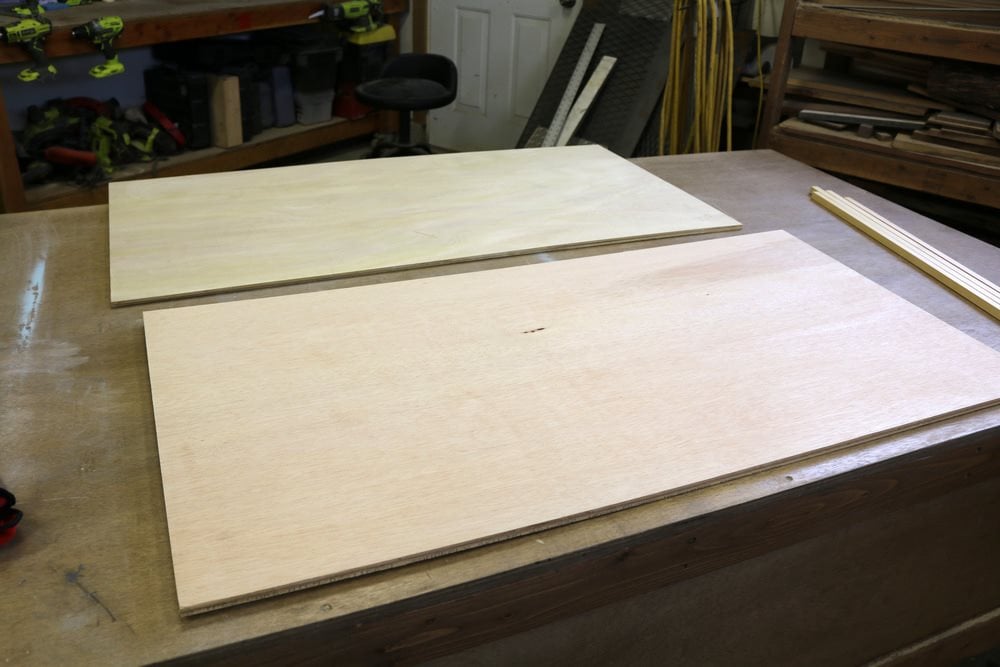
Cut the plywood to size. Cut the 13mm thick plywood to 1.2m by 76cm. Cut two pieces of 6.5mm thick plywood to 1.2m by 76cm.
STEP 2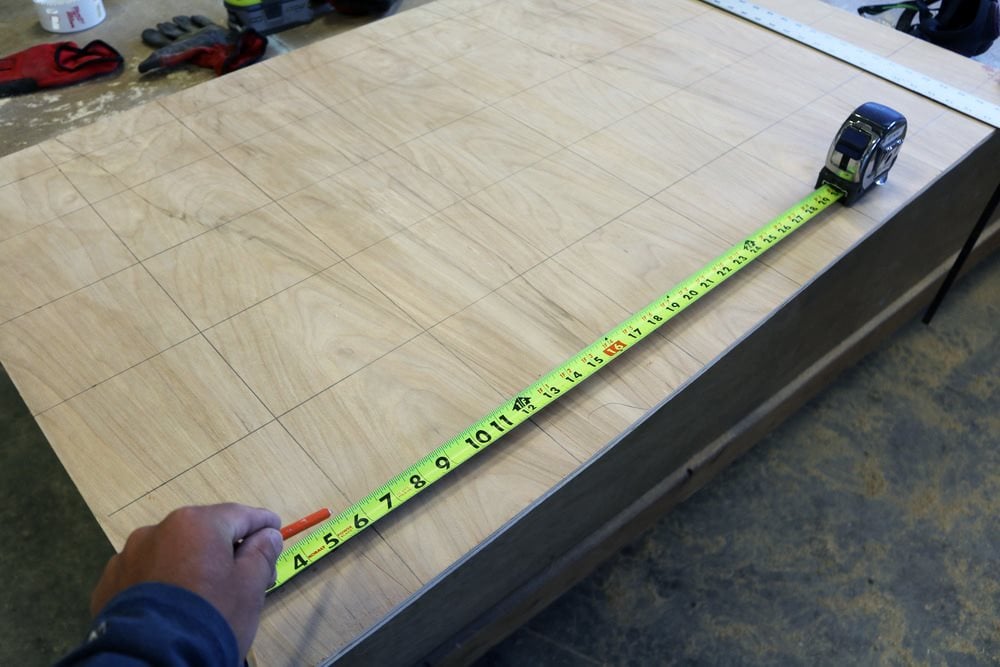
Clamp the two 6.5mm thick pieces of plywood together. Measure for hole locations in the 6.5mm plywood according to the plans.
STEP 3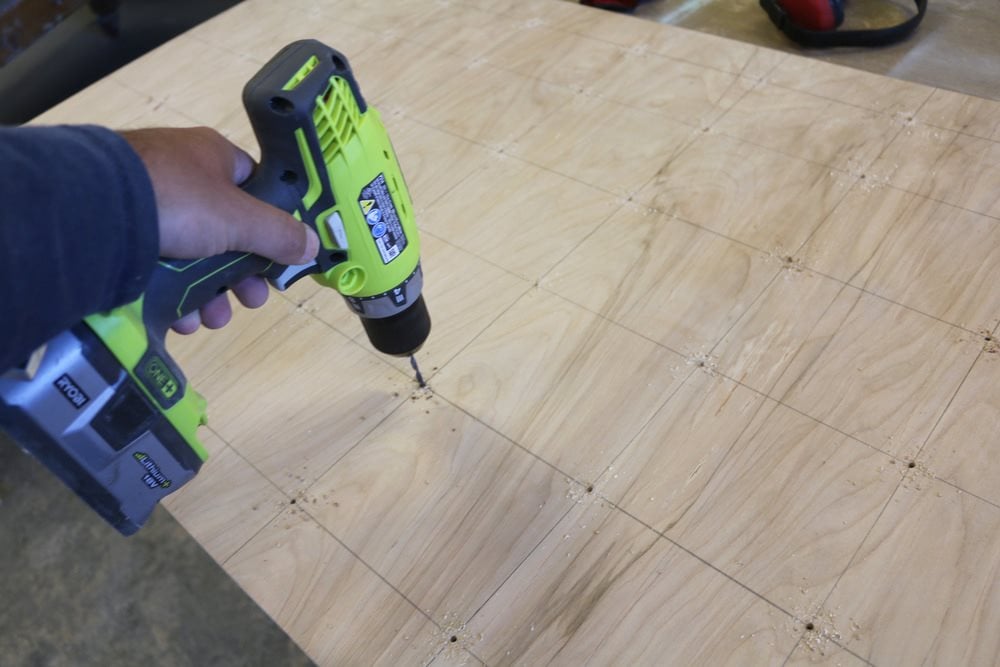
Use a small drill bit to drill a pilot hole at each hole location. This game is 7 holes left to right and 6 holes top to bottom.
STEP 4
Cut the circles for the two 6.5mm sheets that are clamped to each other using a circular saw. Secure the boards and take your time to safely cut each hole. Hole saws are dangerous, so please be mindful when using it. The 18V battery powered drill will do the job here.
STEP 5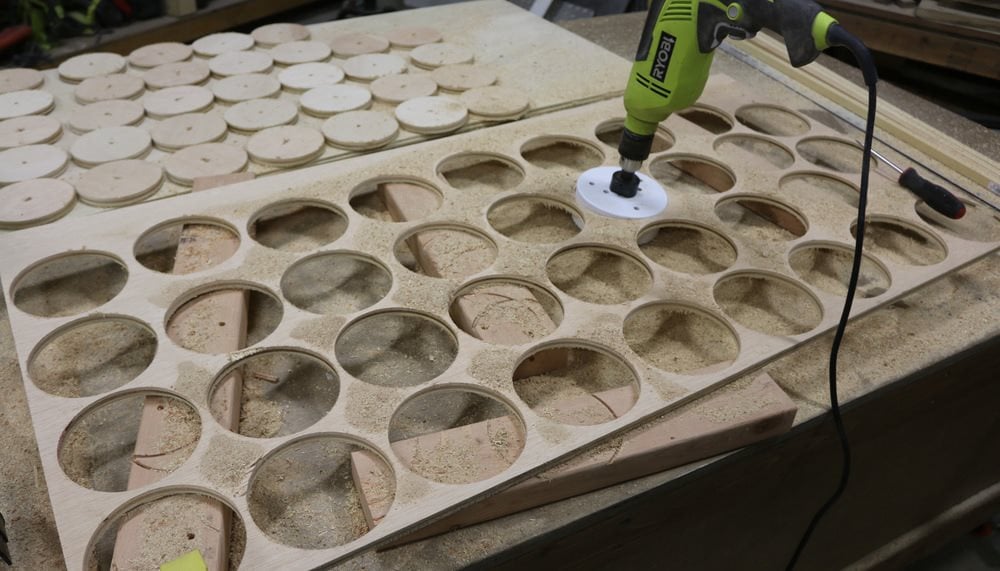
Cut the 13mm thick 12.7cm diameter discs with the hole saw.
STEP 6
Sand the disks and the plywood game board with an orbital sander. Use a belt sander for the disks if you have one.
STEP 7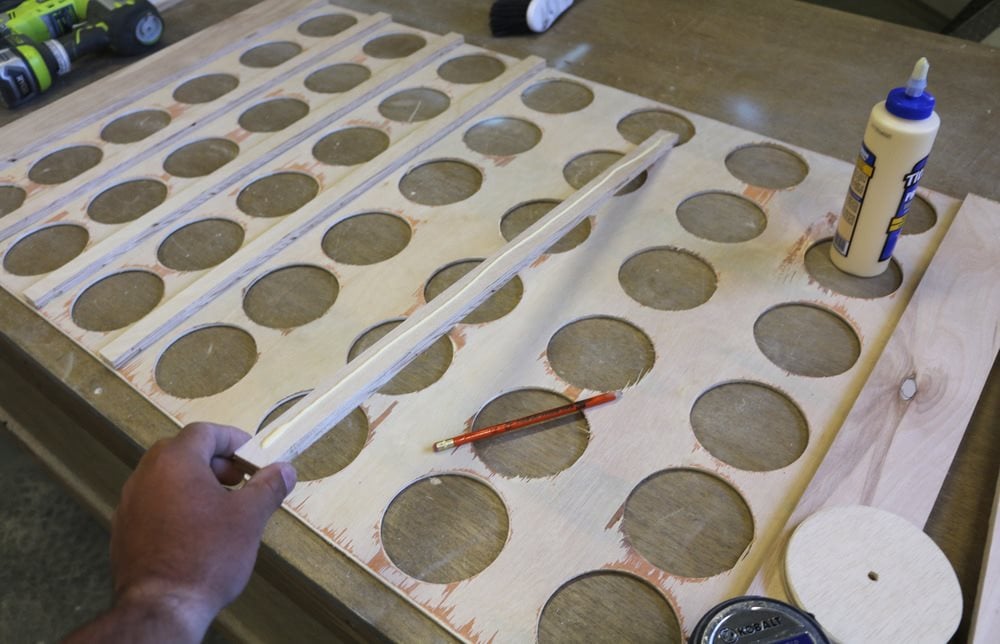
Cut the spacers that will go between the boards. Make six 2.5cm wide by 76cm long strips. Glue and attach them with the 16mm nails. Cut the two end boards to 9cm in width by 76cm in height.
STEP 8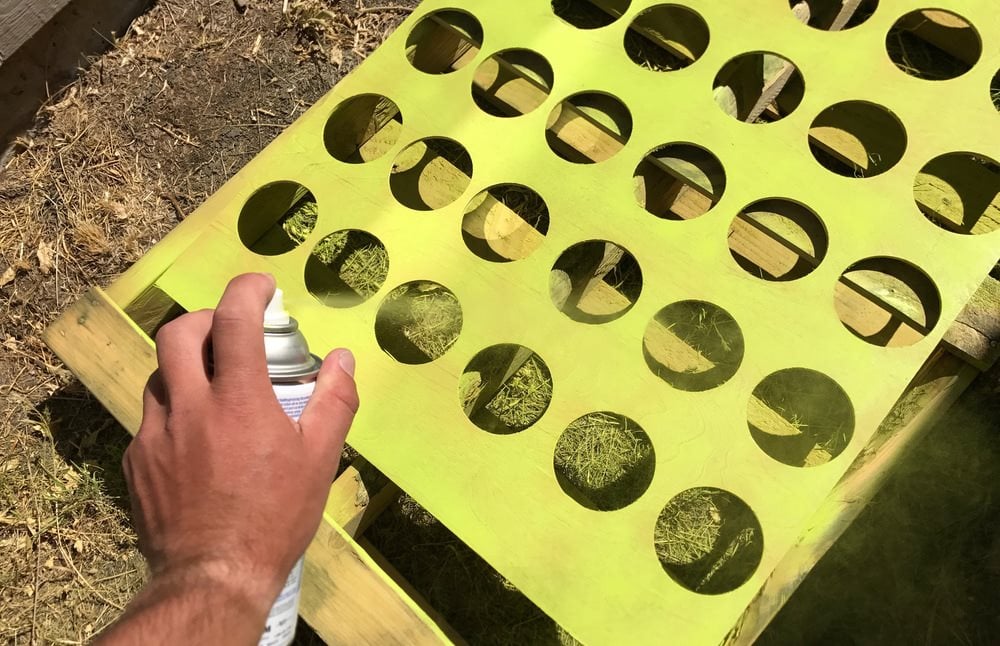
Paint or stain the the game pieces prior to adding the other side. This will ensure you are able to get all the areas covered.
STEP 9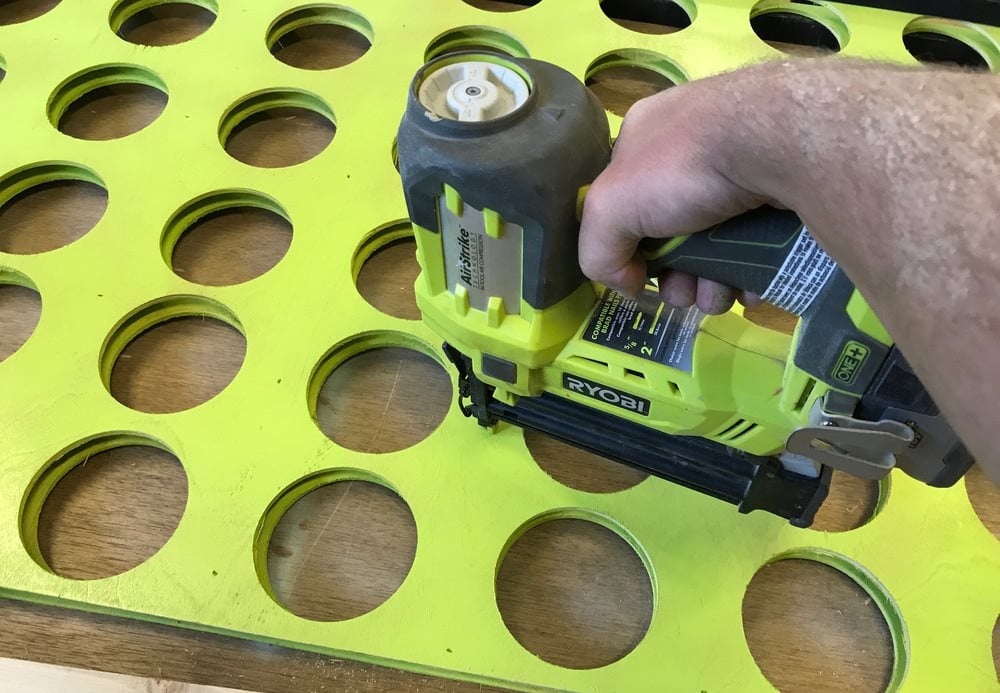
Attach the other side of the game board using glue and 16mm long 18 gauge nails.
STEP 10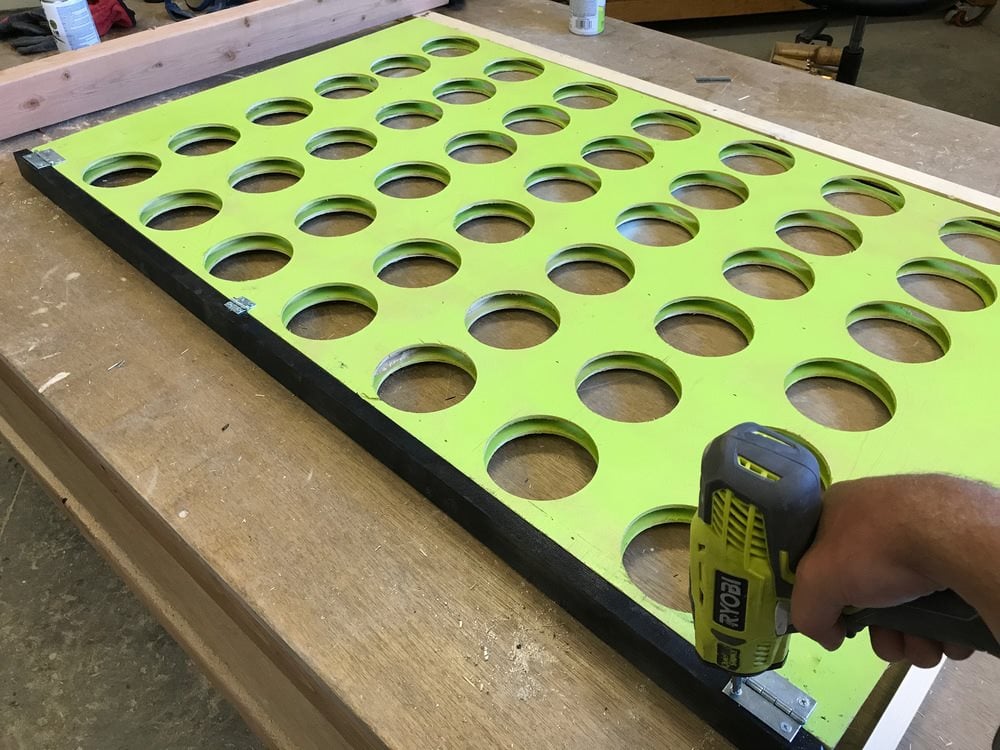
Cut a 30cm x 5cm board down to 122cm in width. Next, use 2 13mm hinges on each end to allow the board to flip down. This is how you will empty the discs. Add 1 or 2 smaller 2.5cm hinges toward the center that are between the discs.
STEP 11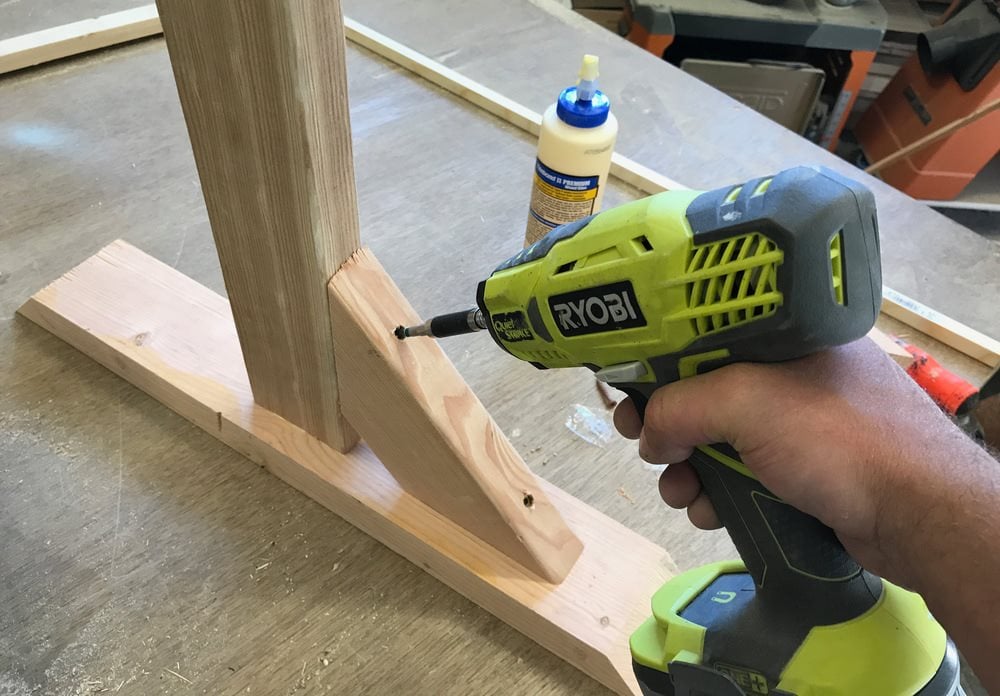
Build the stand for the game. This involves cutting 60cm x 10cm boards to length. All of the angles used are 45°
STEP 12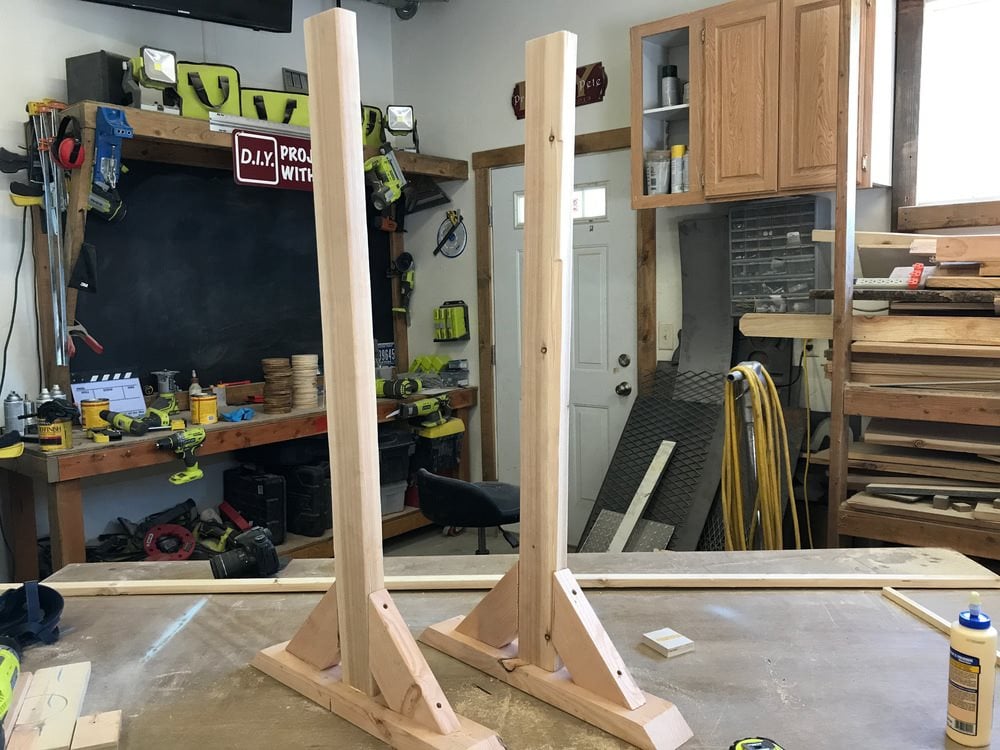
Here is what the side stands will look like. Paint or stain the stand.
STEP 13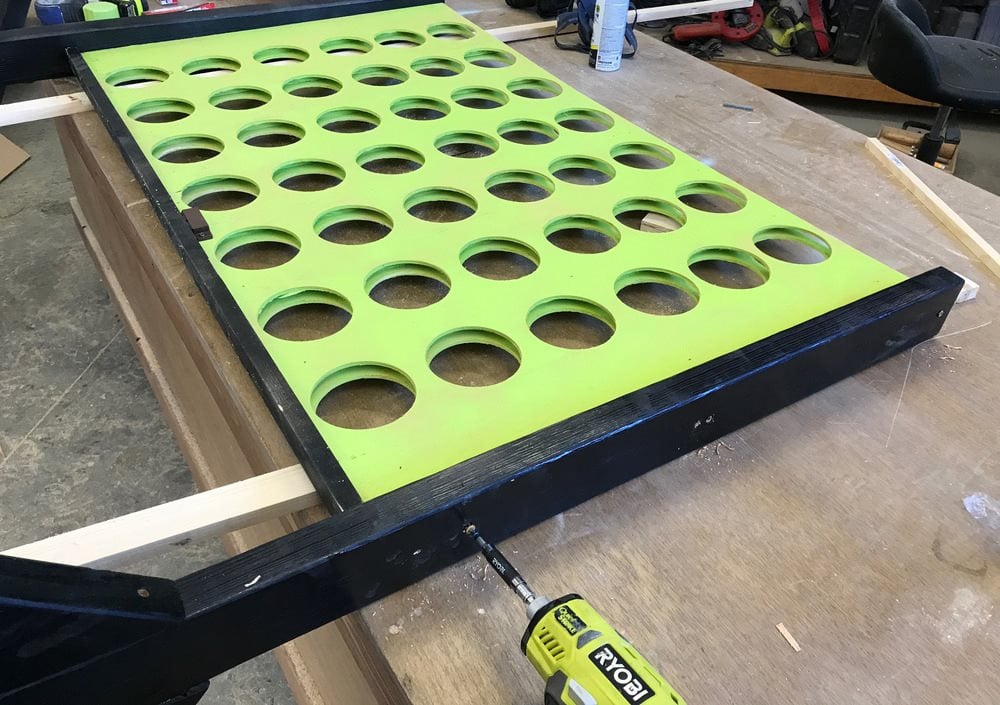
Attach the stand to the game board sides using 7.6mm long screws and wood glue.
STEP 14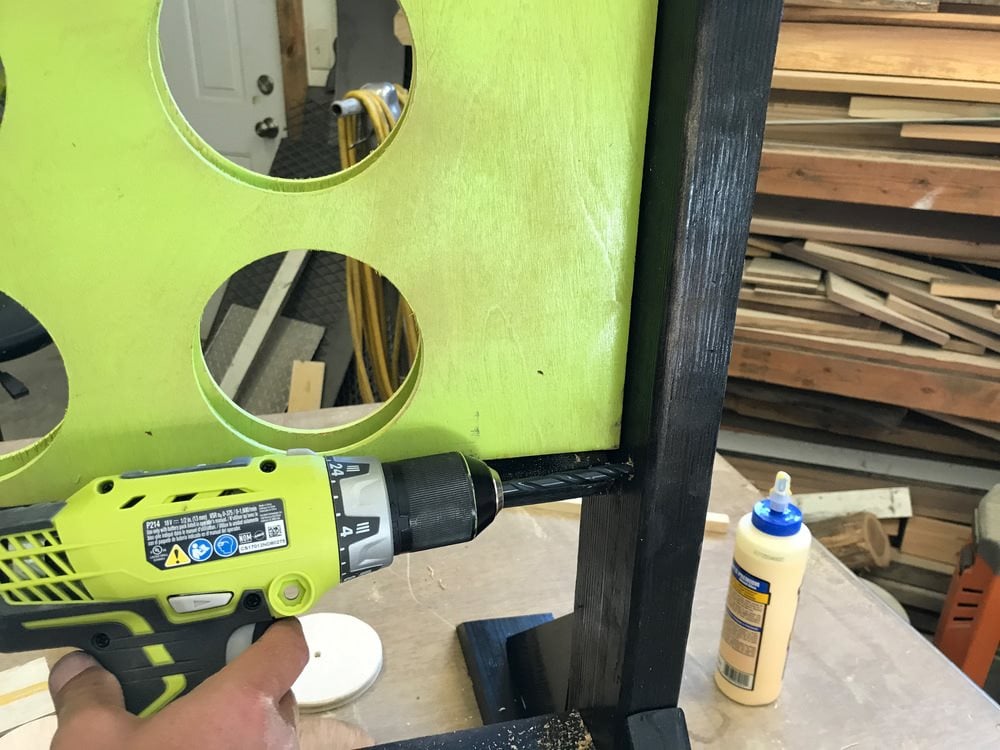
Add a latch. We do not have it pictured, but a bolt latch will work well.
STEP 15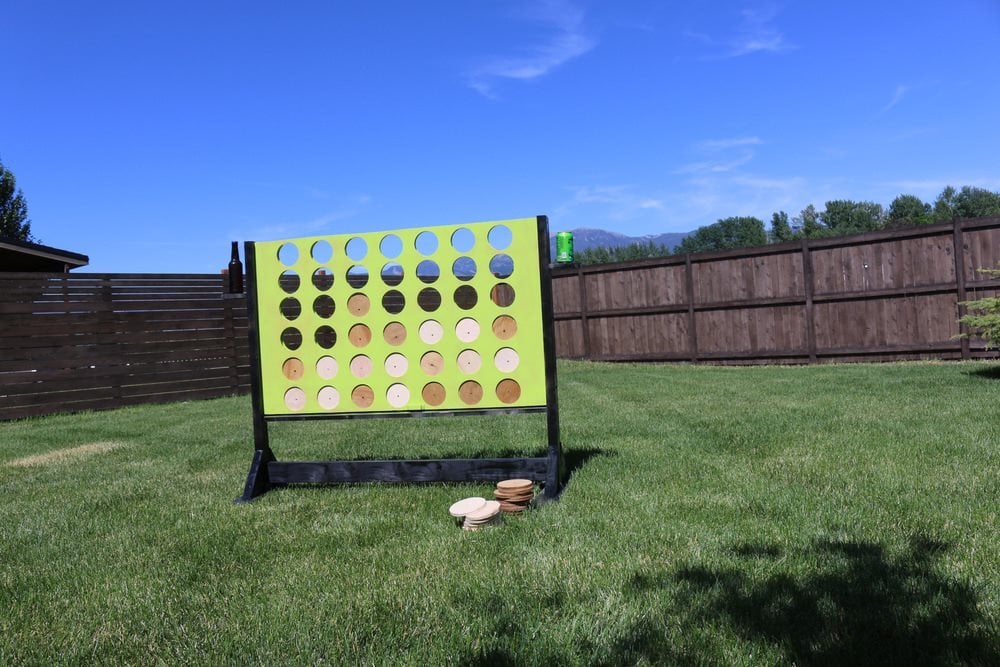
Add a 122cm wide lower support to help give the stand additional strength. Paint or stain half of the disks so 21 are a different color then the other 21. Enjoy your Four in a Row game!
Don't forget to tag us in your DIY projects on @ryobitoolsuk