DIY Dog Bowl Stand by DIYish by Chloe and Claire
Keep your pet pal refreshed with this DIY bowl stand.
We’re both dog lovers and love DIY, so a perfect match was to make a dog bowl stand using our favourite RYOBI tools. Our dogs are both labrador mixes and are the best of friends, they love walks, swimming, but most of all FOOD!
Using only 1.5m of wood and some RYOBI ONE+ tools, you’ll get a beautiful bowl stand for your pup.
For this project you will need:
Measurements:
Top: 760 x 225 x 25mm
Holes for legs: 137 x 23mm
Holes for bowls: 180mm diameter, 140mm diameter (measure your own bowls)
Legs x 2: 230 x 220mm

1) The stand is made of a top piece and two legs. Start with the top piece, measure and cut to length.

2) Make sure your food and water bowls have a lip which will sit on top of the stand. The hole should be slightly bigger than the bowl diameter, but smaller than the lip diameter. Measure and mark the internal cuts on the stand top. Use a compass set to the correct size for your bowls.
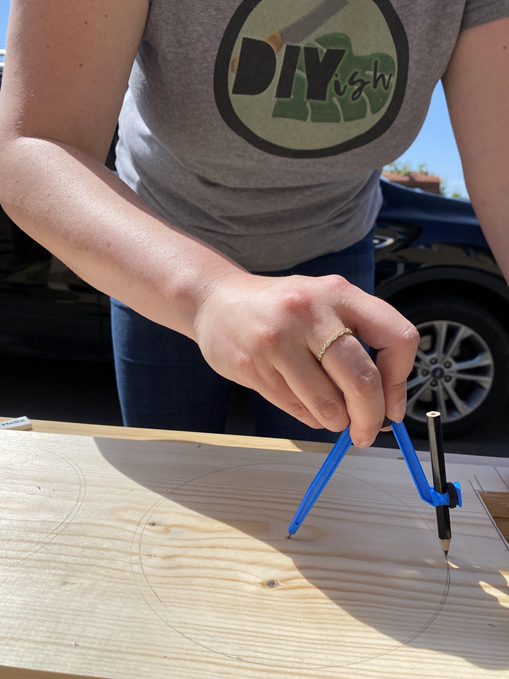
3) Drill a pilot hole in each bowl circle, big enough for the jigsaw blade. We used a 8mm bit.
4) Use a ruler and set square to mark the leg holes.
5) Angle your drill at roughly 30 degrees and drill pilot holes for the jigsaw blade in the leg holes. Use the same bit as the last step. Check which way you’re angling the drill, you want the legs to stick out towards the end, not the centre.
6) Using your jigsaw, set to 30 degrees (check which side you’re setting the angle!), cut along the lengths of the leg holes so that the legs will stick out to the end. Use a chisel and hammer to pop out the angled pieces of wood

7) With the jigsaw set to 0 degrees, use your pilot holes from earlier, cut the bowl holes.
8) Now make the legs. Cut to length - at 30 degrees, making sure the angles are the same at each end of the leg.
9) Take the leg pieces, measure and mark the corner notches.
10) Using the jigsaw set to 30 degrees, cut the notches, making sure your cuts are the same angle direction as both ends.
11) Set the jigsaw back to 0 degrees, and cut down the sides of the leg to create the notch, don’t cut all the way with the jigsaw as you’ll cut off your angle. Use your chisel and hammer like earlier to finish the cut.
12) Slot the legs into the correct holes in the top, make any adjustments needed with the chisel and hammer and sander, including checking for level.
13) Sand smooth so there are no sharp edges.

14) Check your bowls fit nicely, glue the legs in place


15) Seal the wood with waterproof protective treatment.
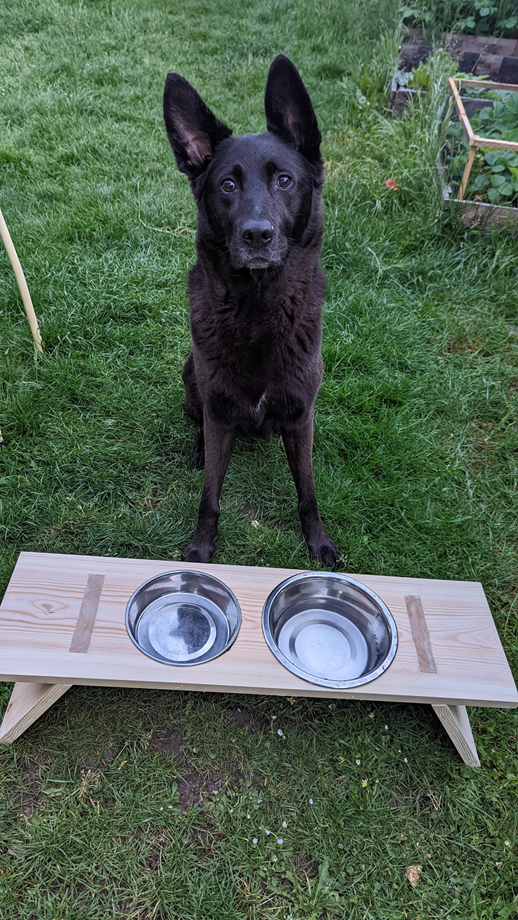
16) Put your bowls in and your pet is ready to enjoy their new raised dining experience!

Dont forget to tag us in your RYOBI Projects @ryobitoolseu