By Susie, Girl and a Drill
Whether you’re looking for a coffee table or new nightstands, you may be surprised to hear that the perfect piece of furniture for your home could be waiting in your local charity shop… It just doesn’t look like your perfect piece of furniture yet!
Let’s be real – old, secondhand furniture can look (and smell!) really ugly. Think unnecessarily ornate trims and feet that just look… well, dated. But I promise you’ll be surprised if you just think outside the box a little, and push your design vision past what’s immediately in front of you.
Next time you’re in a charity shop, I challenge you to take a few minutes to look at a piece of furniture and imagine stripping the unnecessary trims and dated feet away. What would you be left with? Could it be the perfect base for creating a piece of furniture you’d love to have in your home?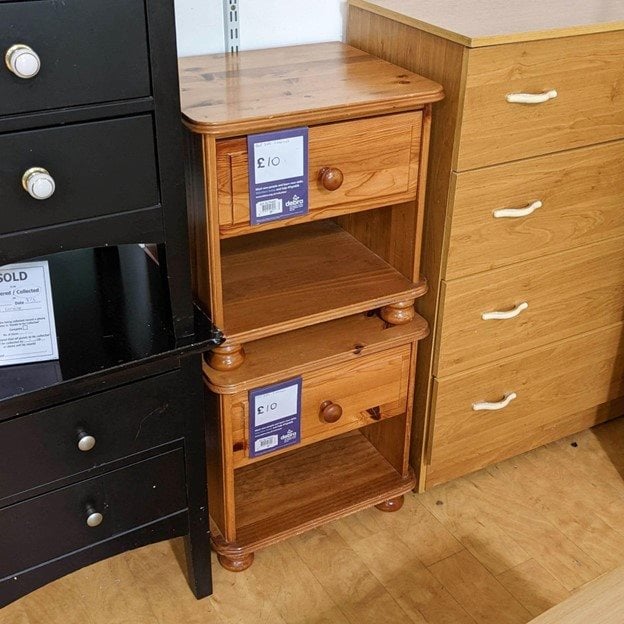
I spotted these matching pine nightstands in a local charity shop, they cost just £10 each and are solid wood! With most of us keeping sustainability front of mind these days, flipping secondhand furniture really is a win-win situation.
So, let’s flip these nightstands!
TOOLS USED:
18V ONE+™ Cordless Combi Drill
Mixed Drill Bit Set (18 piece)
18V ONE+™ 216mm Cordless Sliding Mitre Saw
18V ONE+™ Cordless Random Orbit Sander
18V ONE+™ Cordless Planer (Optional)
18V ONE+™ Cordless Jigsaw
STEP 1
The first thing to do with any secondhand furniture piece is to clean it thoroughly with degreaser.
Eager to get rid of those old fashioned feet, I checked that there were no screws holding them in place and gave them a knock with a mallet. And voila! They popped right out!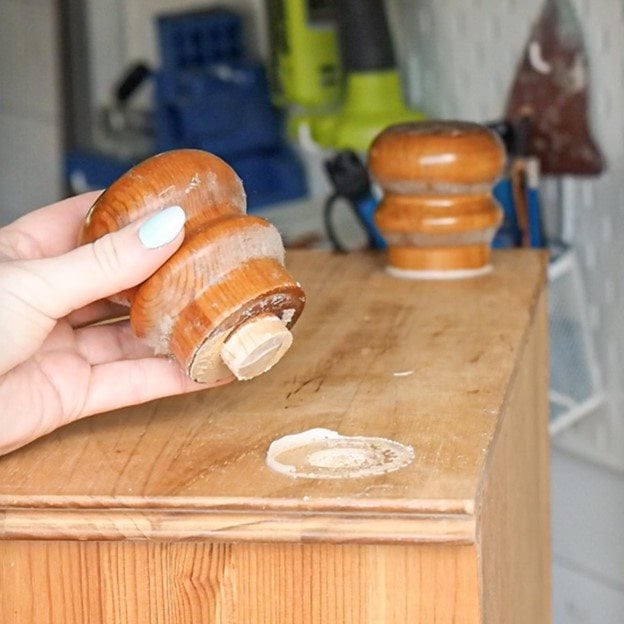
To remove the overhanging trim around the edges, I marked cut lines with a pencil and got to work with my circular saw.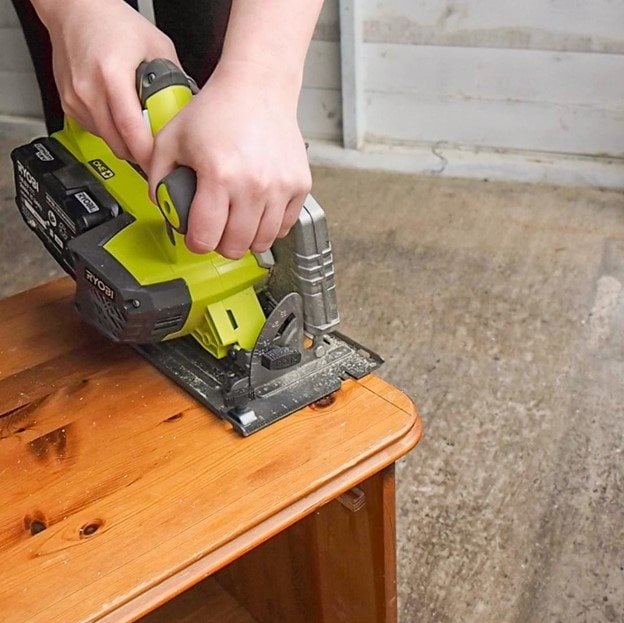
Bright orange varnish is really common on older, pine furniture, and can be really off-putting at first sight. Don’t worry though, it’s easy to remove with an orbital sander. Start at 120grit and work your way up to 400grit for a super smooth, buttery finish.
Note: Be sure to check the instructions on your chosen stain or varnish, as recommended sanding grits may vary across different products.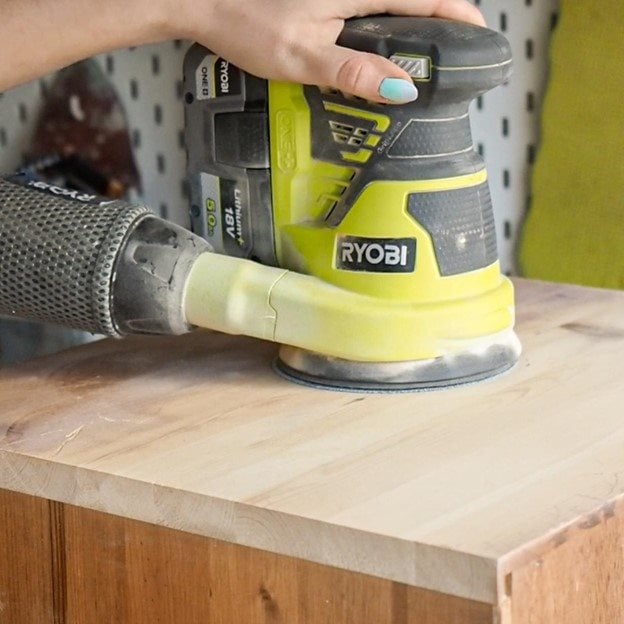
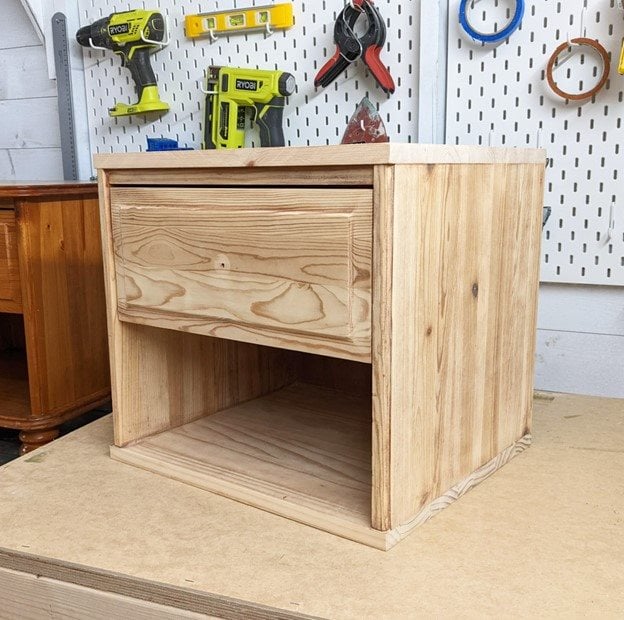
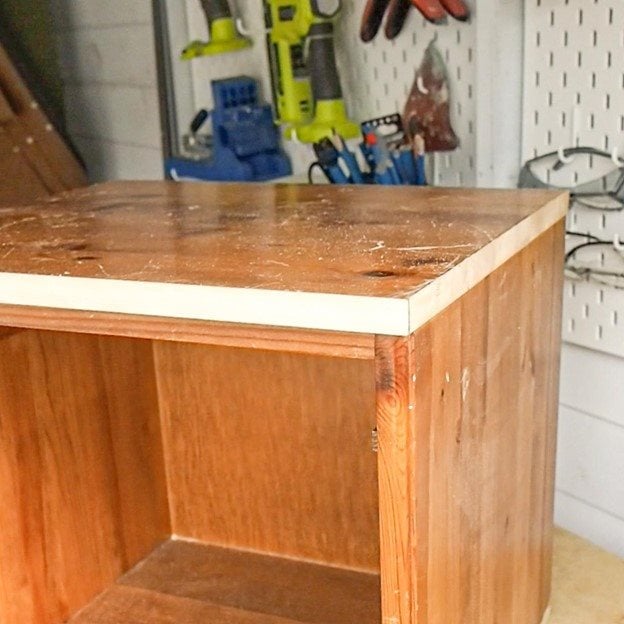
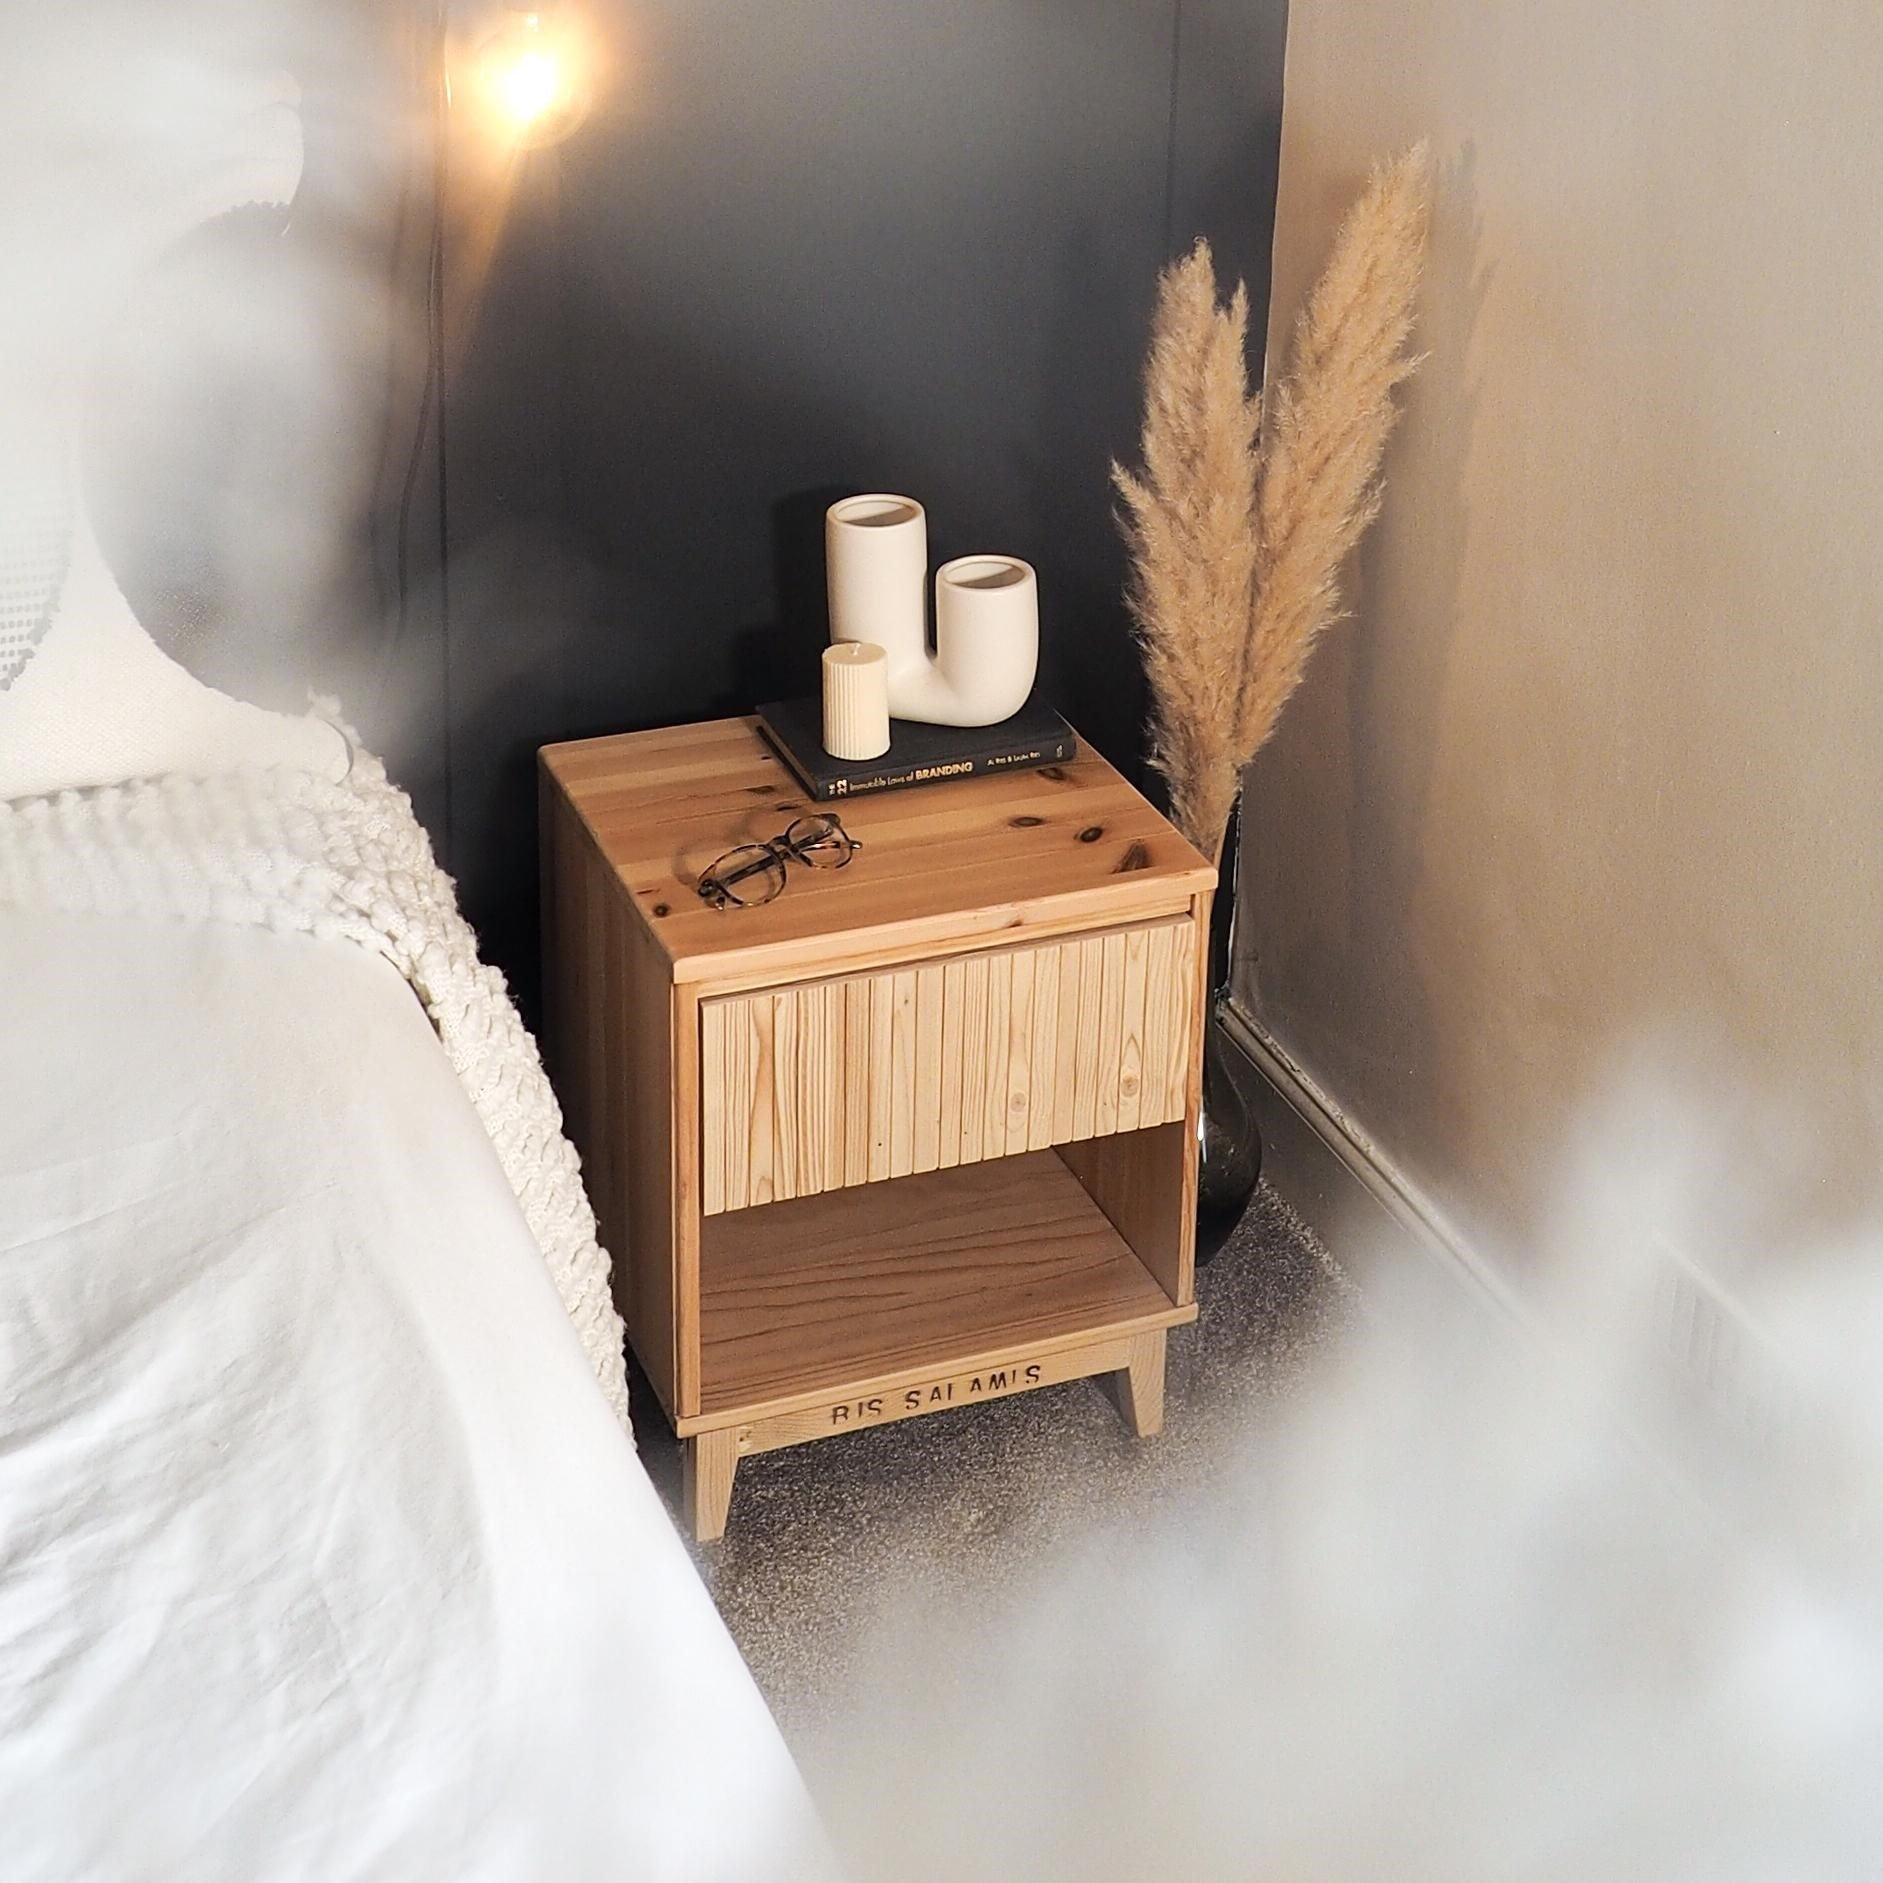
You can see how much better it looks after these few simple steps. Now, it’s time to make it even better!
STEP 2 - Drawers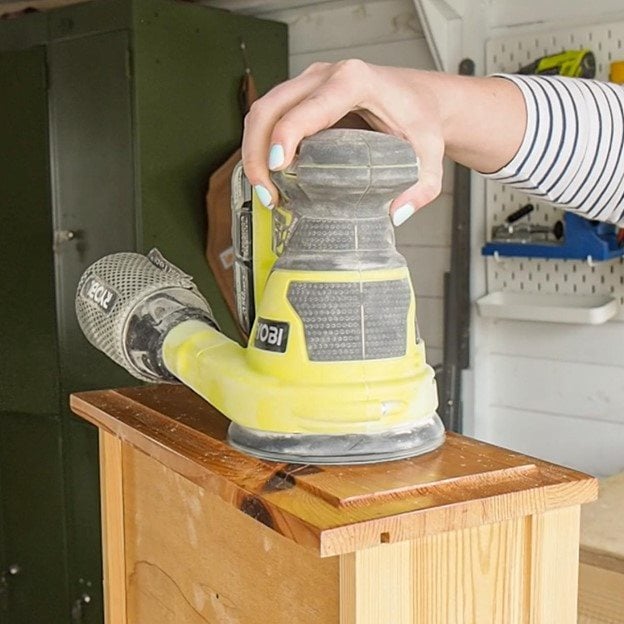
Moving on to the drawers, I removed the raised area on each one so that I could add a unique design twist later on. Here’s a couple of suggestions for how to do this:
1. Cordless Planer – This tool will save loads of time by shaving off small amounts of wood with each pass. I like to set mine between 0.5mm–1mm, this helps maintain an even surface.
2. Orbital Sander – A little more patience is required for this option, however it will do the job perfectly well if you don’t have an electric planer.
And now for that unique design twist! I used my circular saw to cut fluted tongue & groove boards to the same height as the drawer fronts. I used wood glue to attach the pieces, applying small strips of masking tape to hold them in place while the glue dried.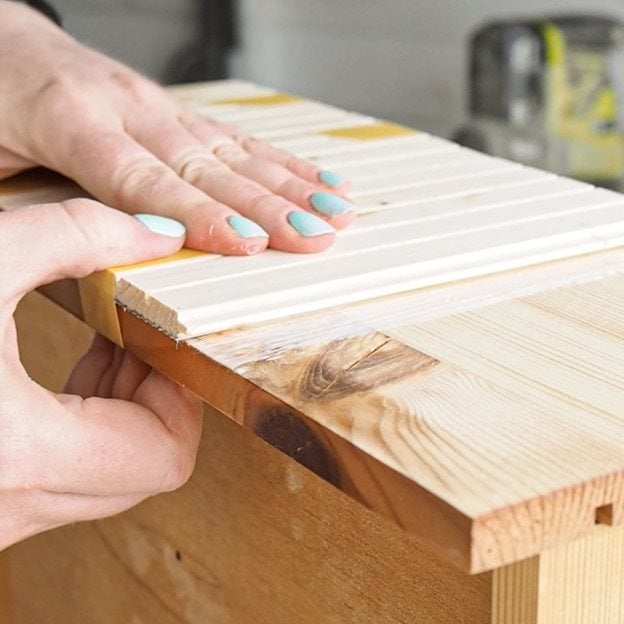
For an extra neat finish, I added some wood veneer edge banding to cover up any gaps between the tongue & groove and the drawer front.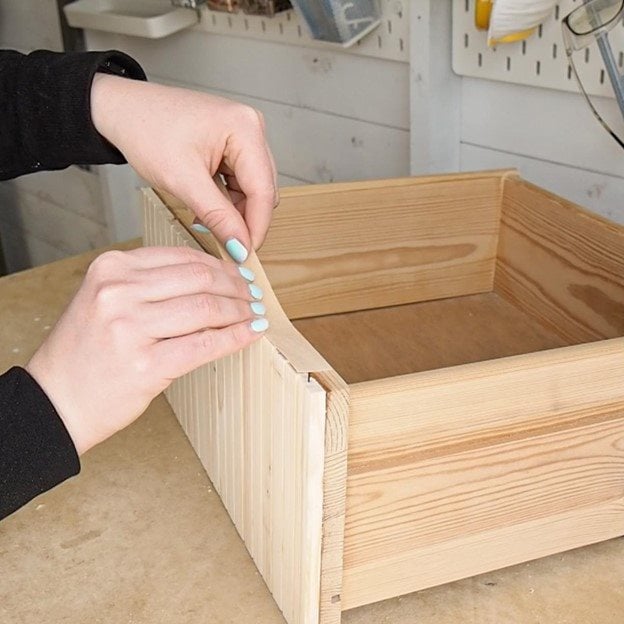
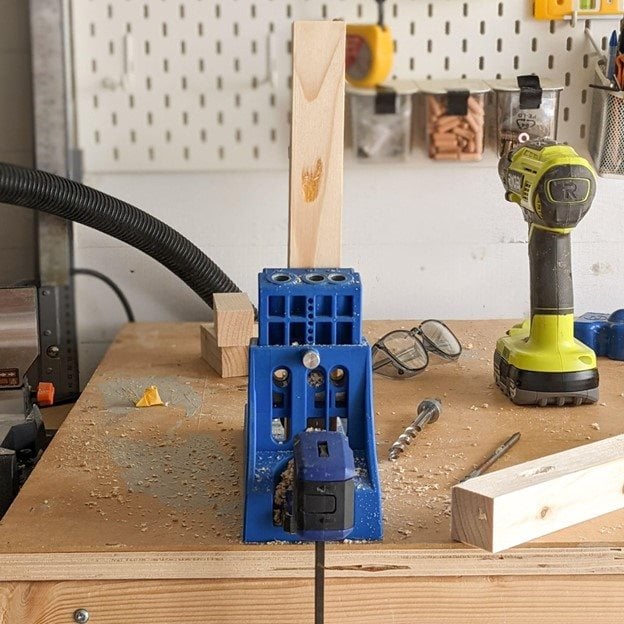
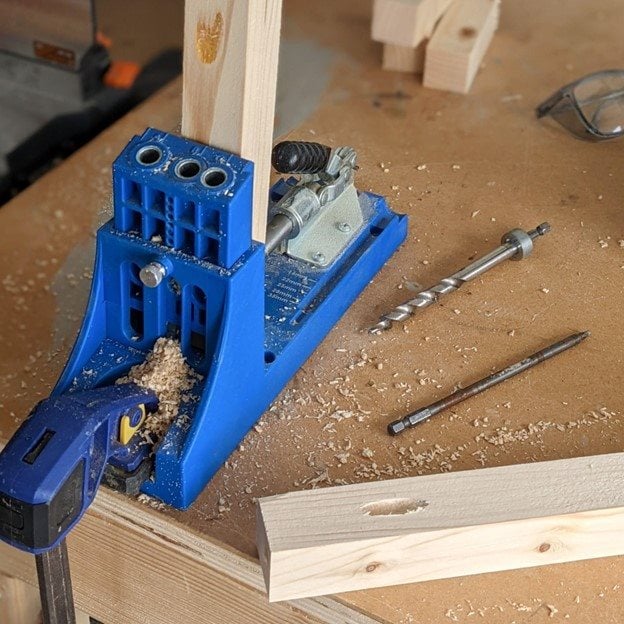
STEP 3 - Base with Feet
Your cut list for the base and feet will depend on the size of the furniture you’re working on, and how tall you want it to be. Essentially, you’ll need four long pieces of timber for the sides, and four shorter pieces for legs.
This diagram shows a top-down view of how the pieces are assembled using pocket holes: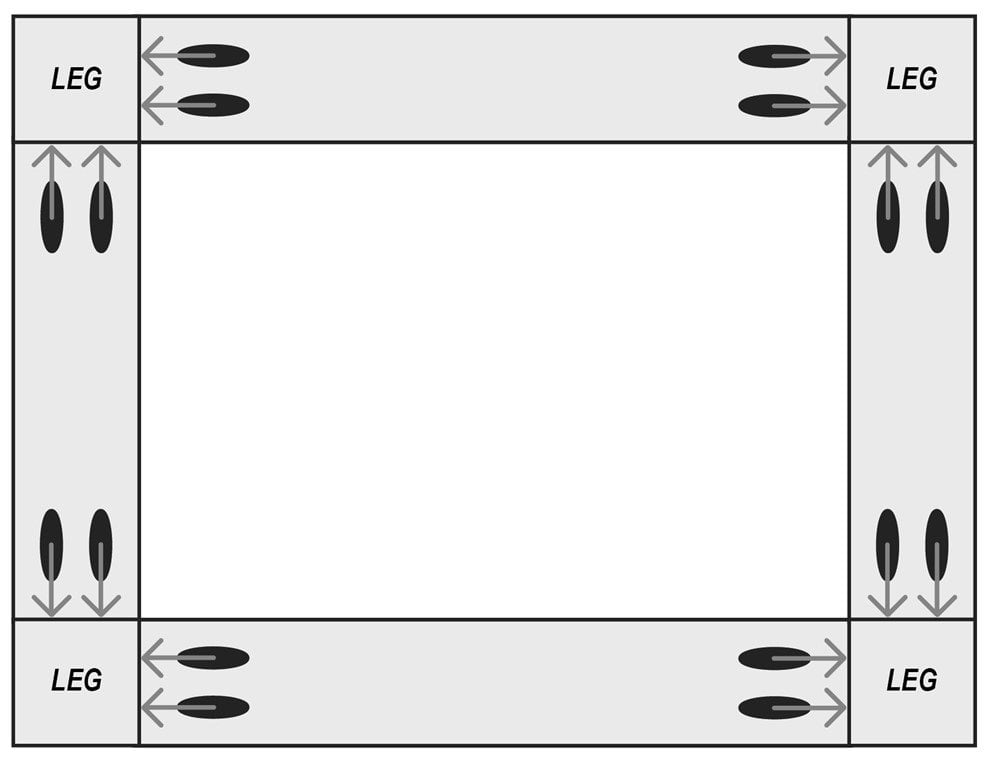
For an added design feature, cut angles in the legs using a jigsaw. Don’t forget to clamp your piece in place first!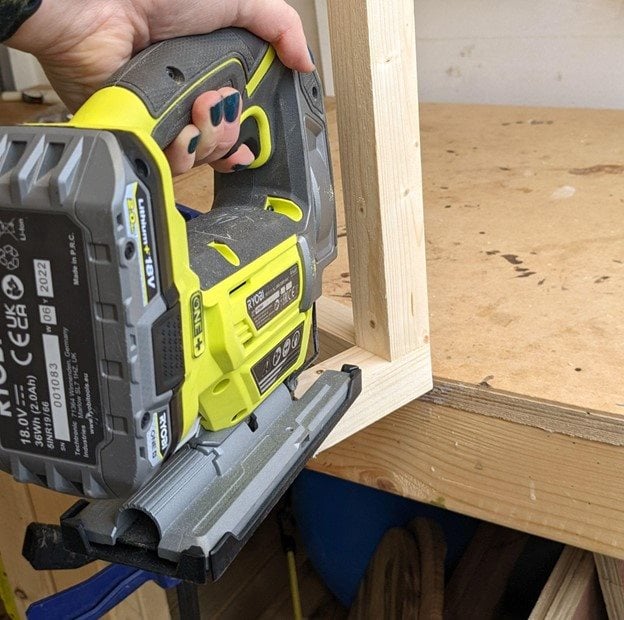
/How-to-Build-DIY-Matching-Nightstands/Picture17.jpg "Picture17.jpg")
To attach the base to the unit, drill pilot holes and secure with wood screws.
The image below shows my suggested placement for the wood screws: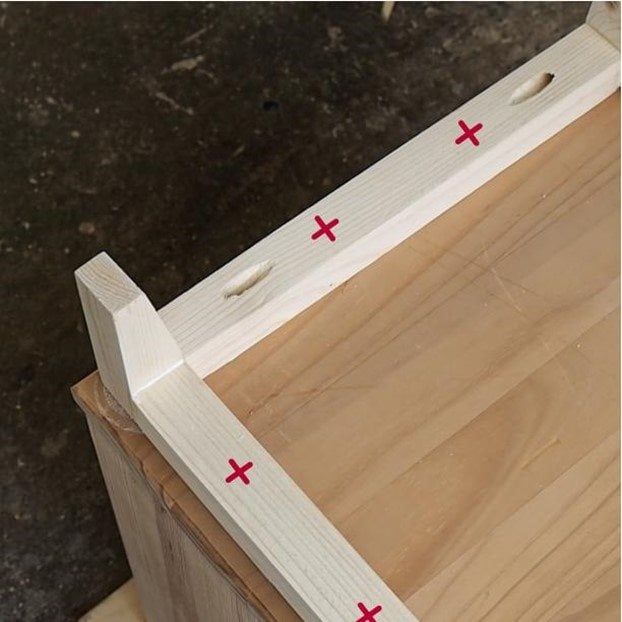
And finally, protect the piece with a stain of your choice. In this case, I wanted to maintain a raw timber look, so I used a clear, water-resistent matte top coat.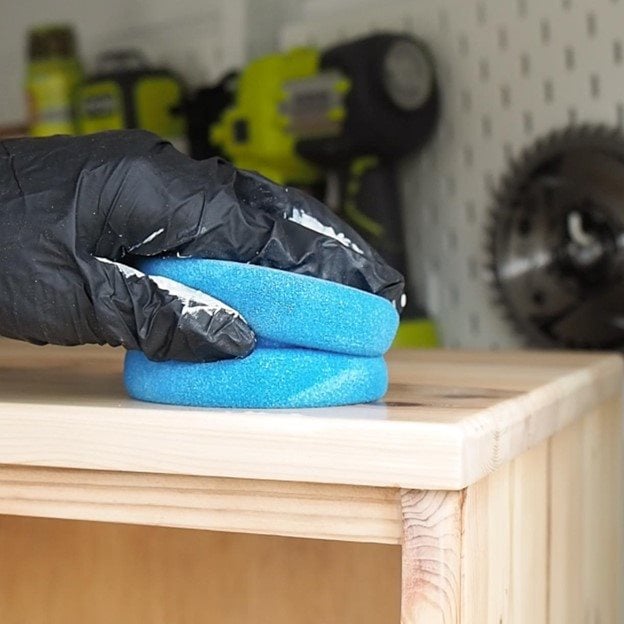
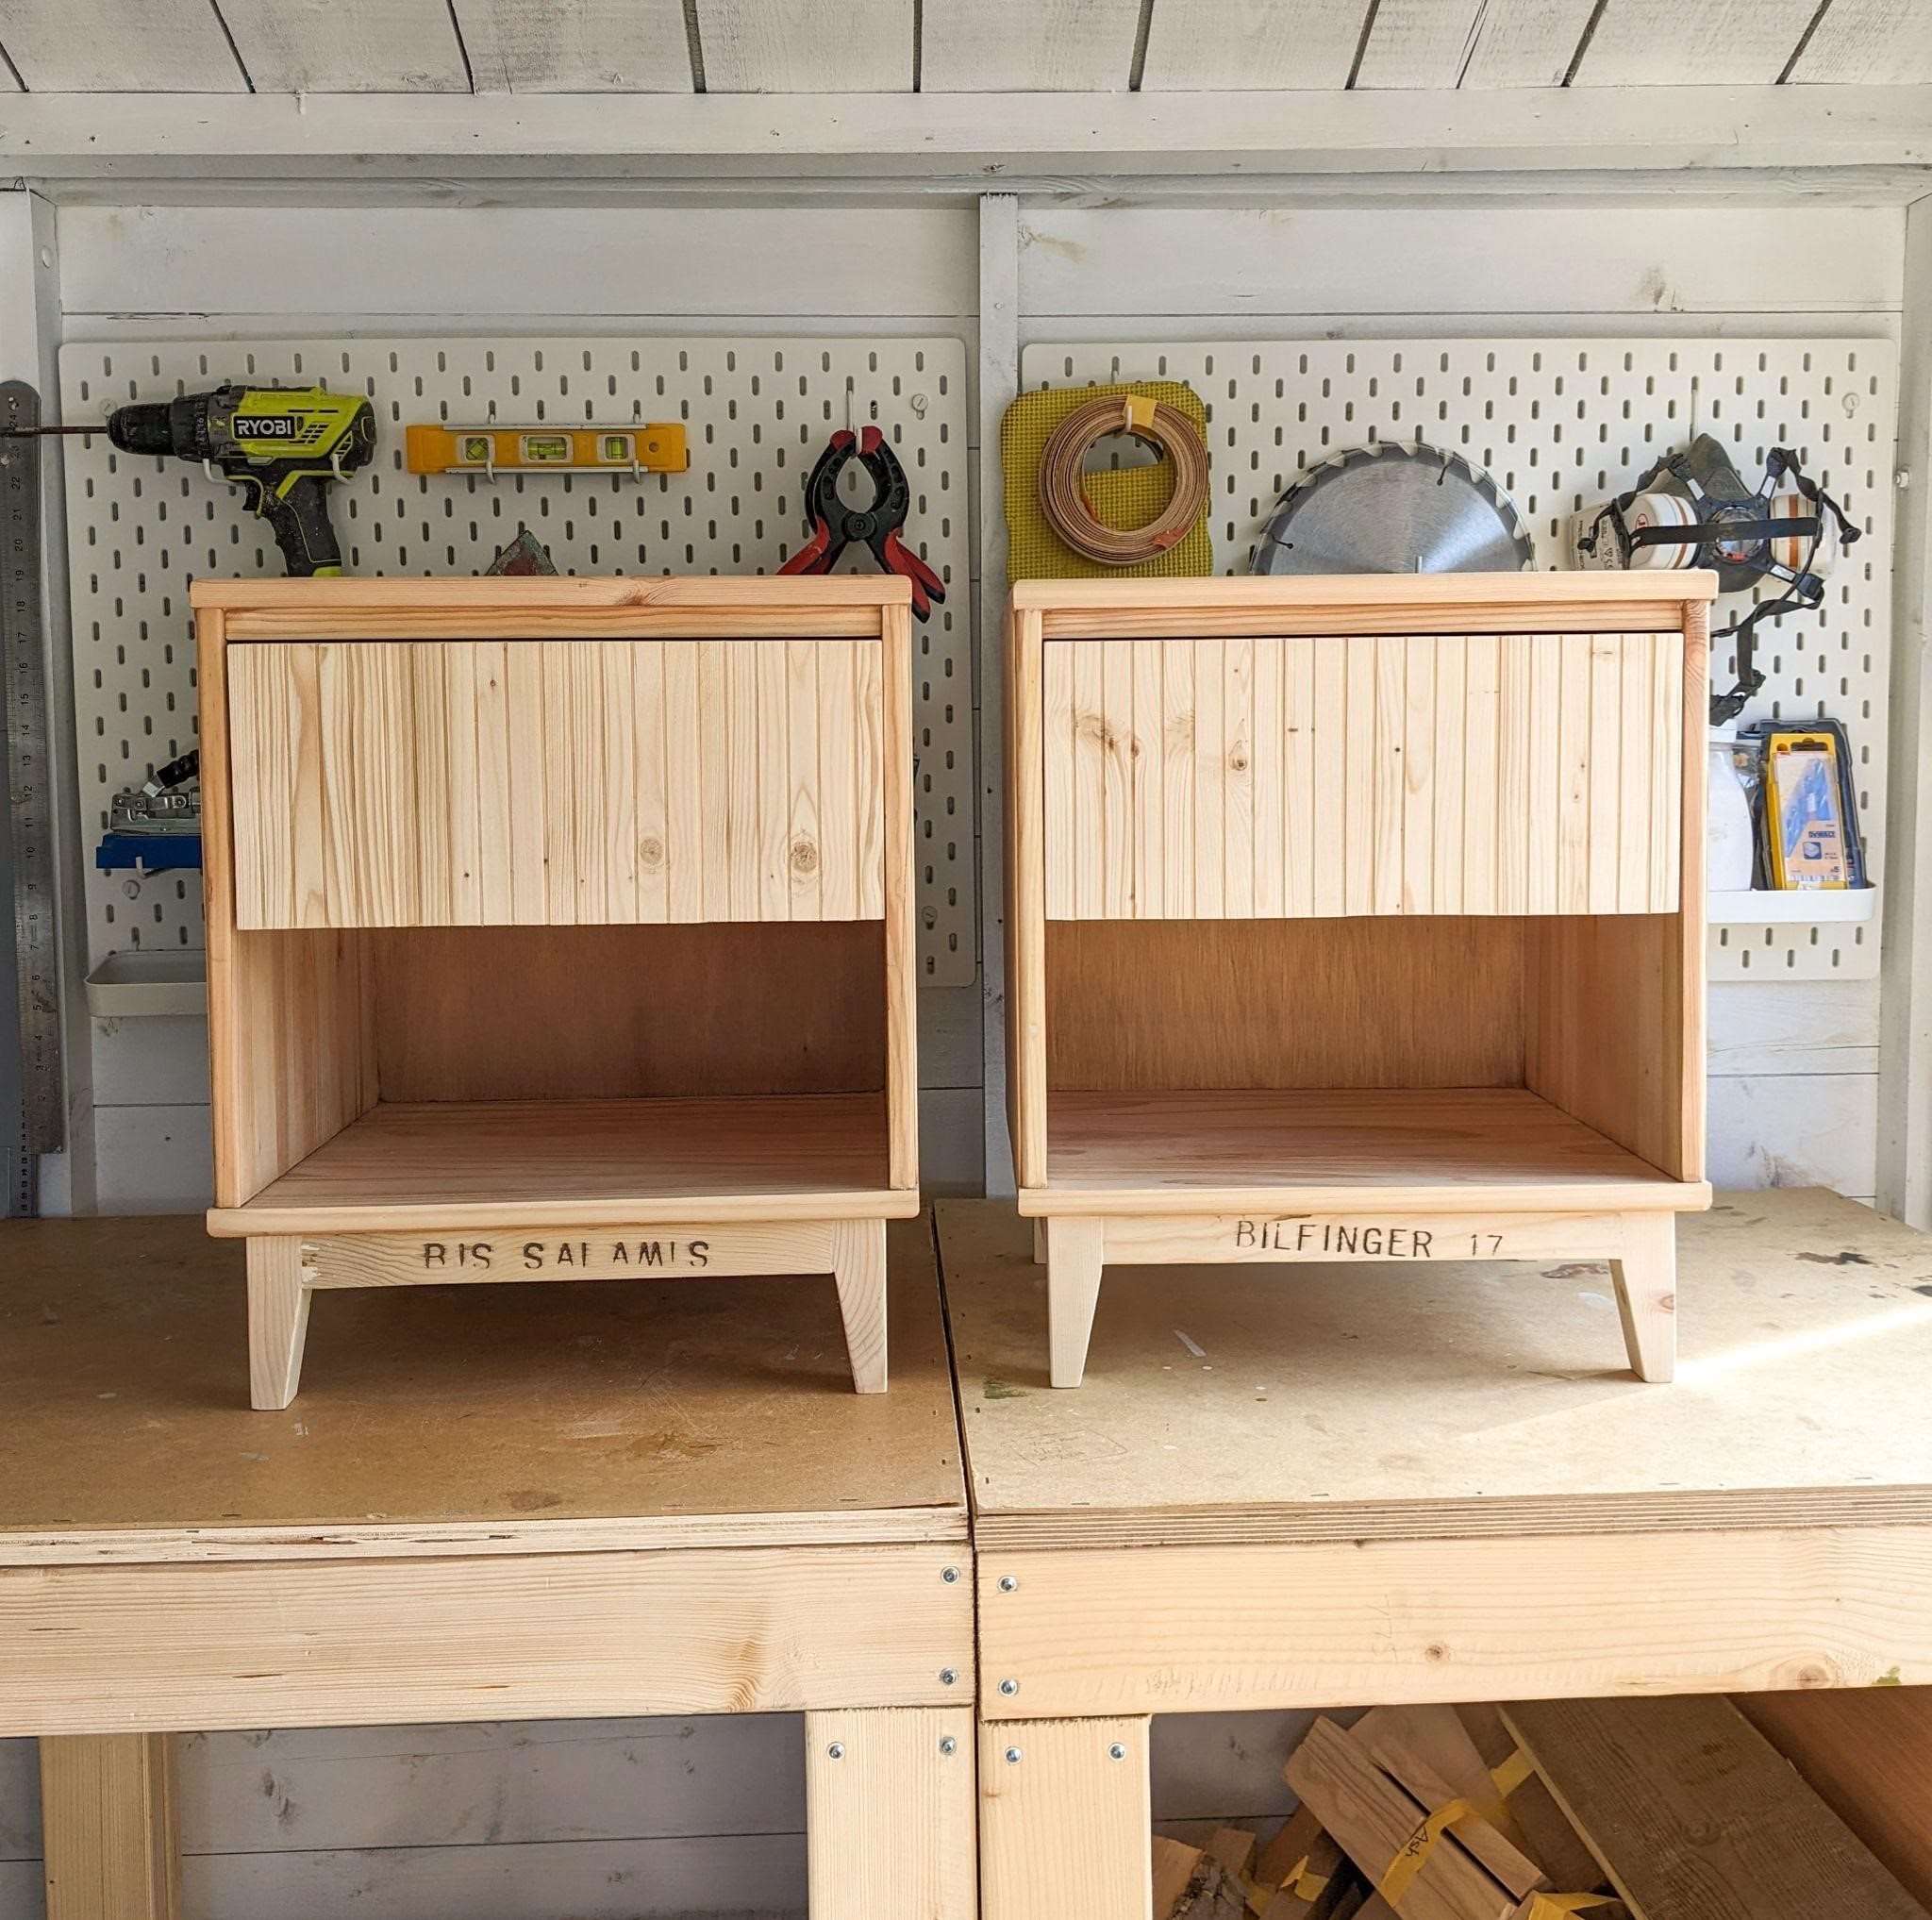
I hope this project inspires you to try flipping your own piece of secondhand furniture!
ENJOY!
By Susie, Girl and a Drill
https://www.instagram.com/girlandadrill/
Don't forget to tag us in your DIY projects on @ryobitoolsuk