We all have that one stretch of wall that needs a little something to fill it. Look no further with this simple & stylish Wooden Wall Art project!
TOOLS USED
18V ONE+™ Cordless 18 Gauge Nailer
18V ONE+™ Cordless Random Orbit Sander
18V ONE+™ Cordless 190mm Compound Sliding Mitre Saw
MATERIALS USED
(1) 61cm X 61cm X ¾” project panel square sheet of plywood
(6) 2.5cm X 5cm X 8’ select pine board squared edges
(2) 8OZ cans of woodstain minwax jacobean & gunstock used
(1) Small bottle of wood glue dap rapid fuse 30 min wood Ashesive used
STEP 1
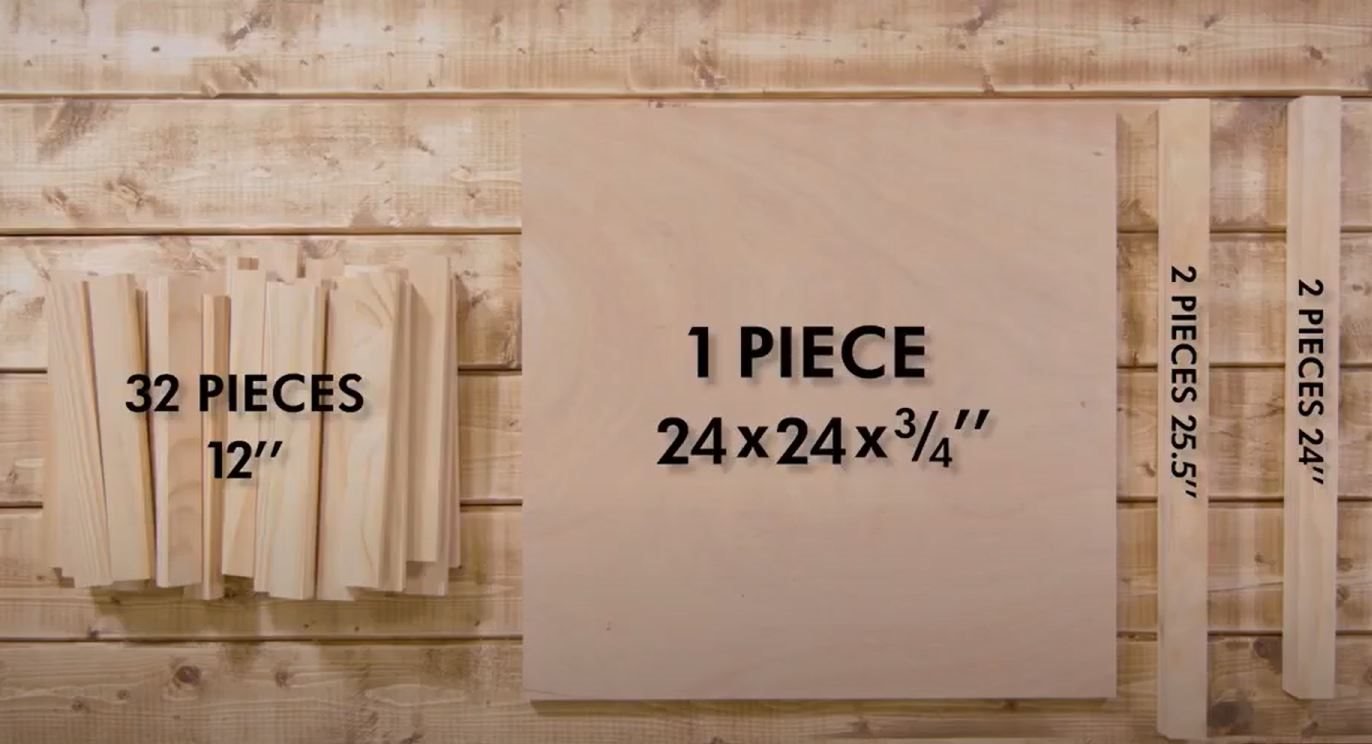
Lumber Cut List: (32) 2.5cm x 5cm x 30.5cm (2) 2.5cm x 5cm x 61cm (2) 2.5cm x 5cm x 65cm
STEP 2
Measure and cut 34 pieces of 2.5cm x 5cm to 30.5cm each on a miter saw. Use sandpaper to smooth out any frayed edges. Check the cuts to make sure they are all the same length. Trim any pieces that are slightly longer.
STEP 3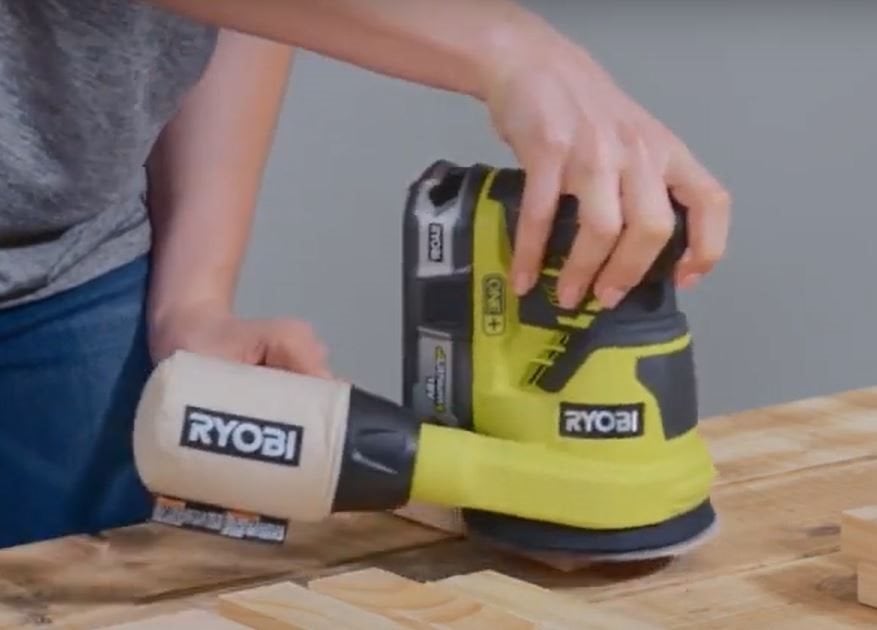
Lightly sand the top of each piece of cut 2.5cm x 5cm x 30.5cm with 220 grit sandpaper. Factory cut lumber has a thin coating that can hinder stain application. Don’t over sand the pieces or round the edges.
STEP 4
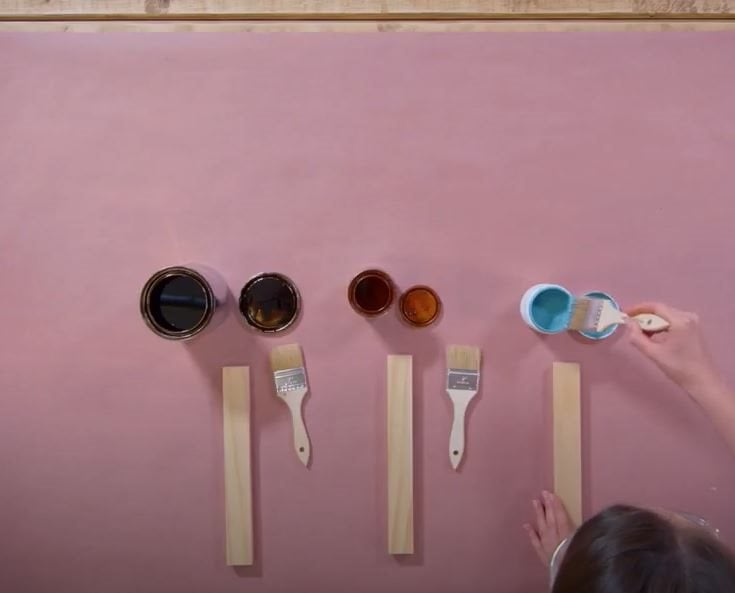
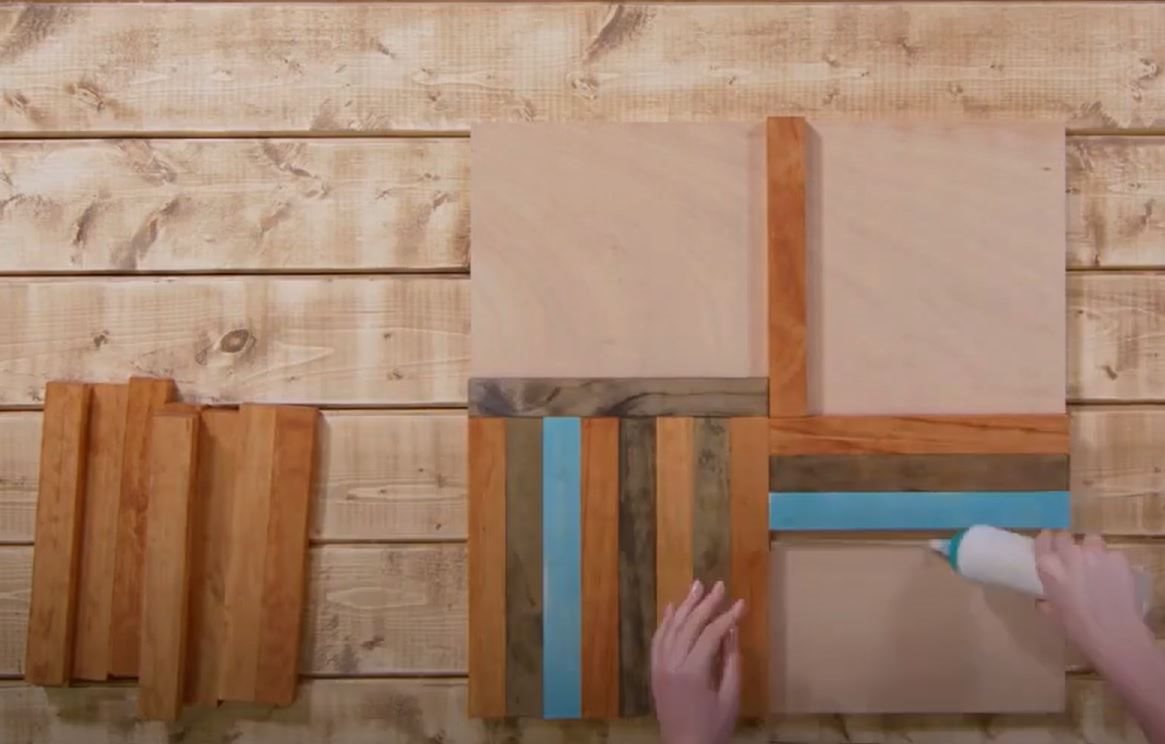
Stain and paint the tops of the 2.5cm x 5cm x 30.5cm pieces. 16 are stained a lighter color. 12 are stained a darker color. 4 are painted with leftover paint. Wipe off any excess stain and allow to dry for the recommended time.
STEP 5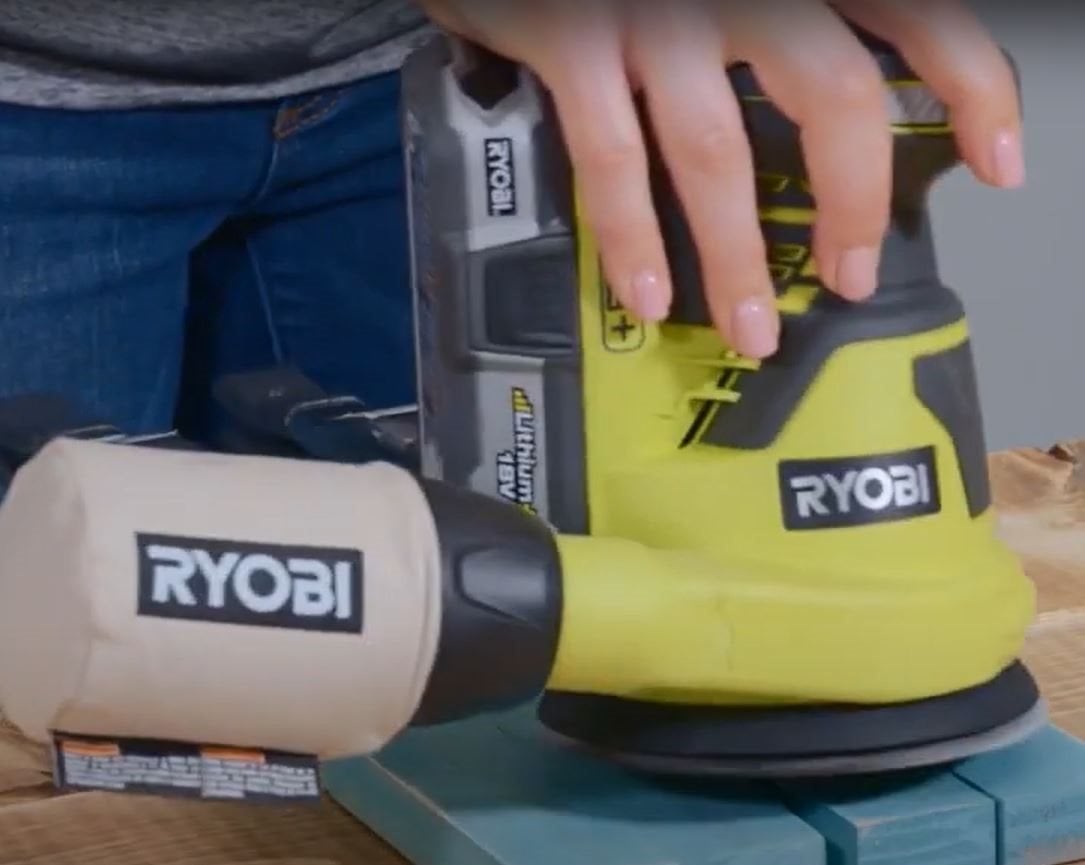 Lightly sand the surface of the 4 painted 2.5cm x 5cm x 30.5cm pieces. Sand around the edges to expose the wood underneath. Be careful not to round the edges when lightly sanding off the painted areas.
STEP 6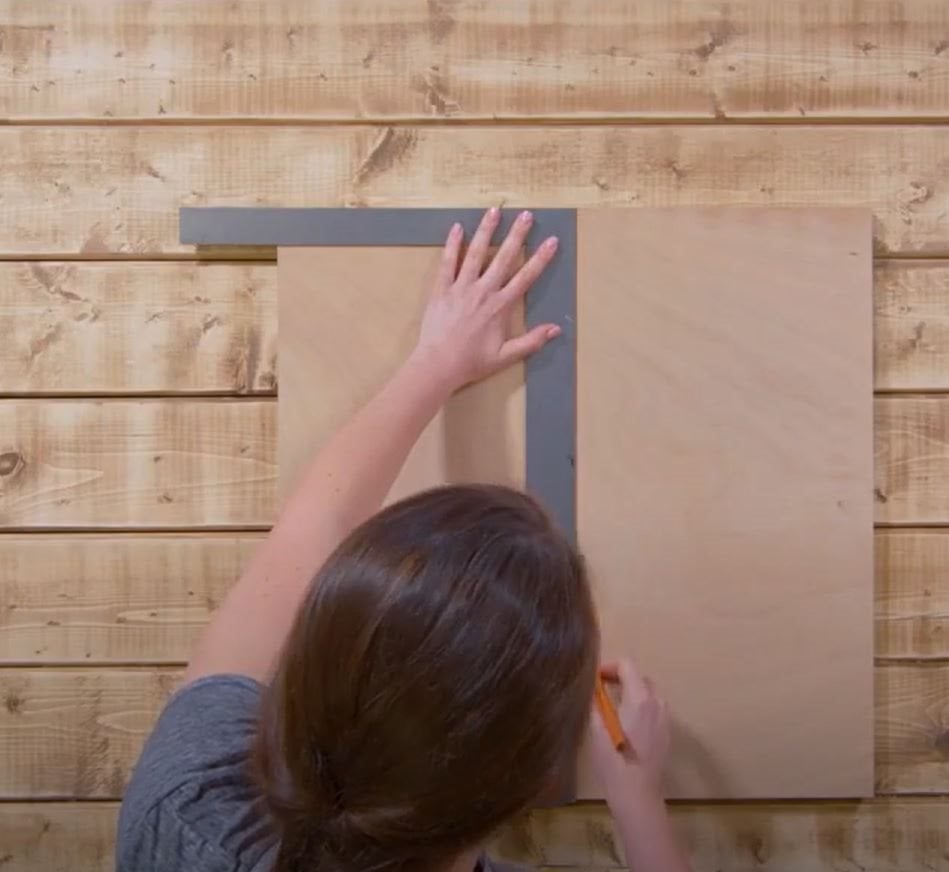
Draw a grid guide on the 61cm x 61cm sheet of plywood making four equal 30.5cm x 30.5cm squares for the pattern.
STEP 7
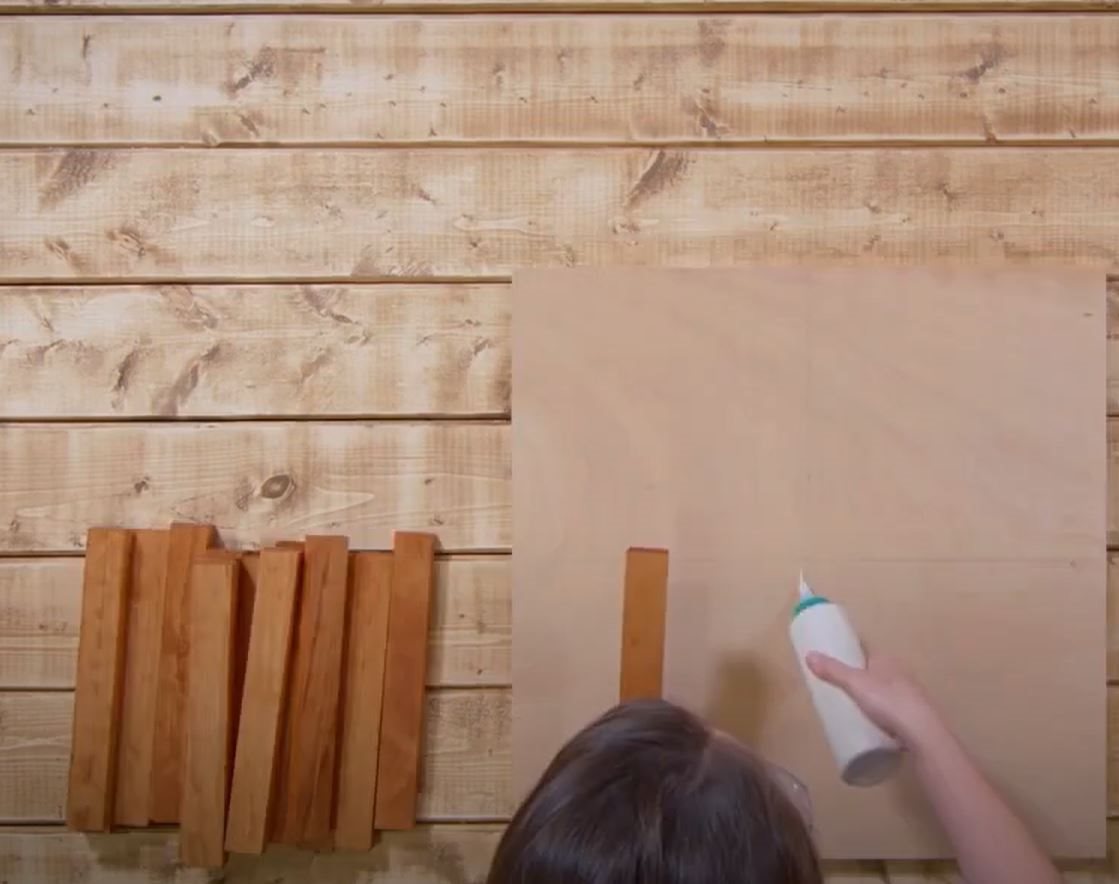
Apply wood glue on the plywood sheet on only the grid section being worked on at that time. Start at the outside edge with the first piece of 2.5cm x 5cm x 30.5cm and work inward. Apply a small amount of wood glue on the inside edge of each piece to adhere to the next piece placed. A 30-minute wood adhesive was used instead of normal wood glue because it allows slight adjustments for up to 30 minutes. A little glue goes a long way.
STEP 8
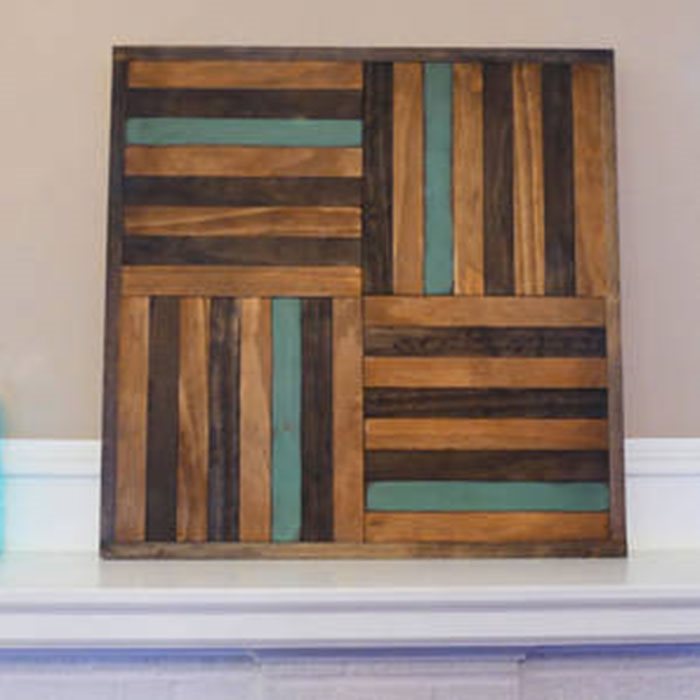
Once all pieces have been placed and the wood glue has dried, apply the darker stain color over the entire piece. Wipe off the excess stain and allow to dry. This will “antique” the painted pieces and highlight the sanded edges.
STEP 9
Measure the width across the piece (it should be 61cm) then cut two pieces of 2.5cm x 5cm to 61cm for the frame. Lightly sand the edges with 220 grit sandpaper and then attach to the edge of the wall art with wood glue and brad nails. Repeat step on the opposite side with the other 61cm piece of 2.5cm x 5cm.
STEP 10
Measure the remaining two edges for the frame (it should be 65cm). Cut and lightly sand the two pieces and attach with wood glue and brad nails to complete the frame. If the frame pieces are a little longer than needed they can be sanded down. Any gaps can be filled with stainable wood filler with the excess sanded off after it dries.
STEP 11
Stain the frame with the darker wood stain. Wipe off the excess and allow to dry. It’s okay if stain gets on the pattern, just wipe off the excess and allow to dry.
STEP 12
Add picture hanging hardware on the back and display!
ENJOY!
Don't forget to tag us in your DIY projects on @ryobitoolsuk