Build this sturdy, cost-effective work bench for only $30!
TOOLS USED
MATERIALS USED
- SAFETY GLASSES
- PENCIL
- #8 COUNTERSINK BIT
- #1 PHILLIPS DRIVER BIT
- (5) 2"X4"X96" PINE 2X4 STUD
- (1)1/2"X2'X4' MDF OR PLYWOOD QUARTER SHEET
- 1 PACK #8 2-1/2" EXTERIOR SCREWS
- CLAMPS
STEP 1

Measure and mark your pieces, cut using a miter saw (or circular saw). CUT LIST: (4) 2"x4"x20-3/4" (A) (4) 2"x4"x44-3/4" (B) (4) 2"x4"x33-1/2" (C) (2) 2"x4"x17-3/4" (D)
STEP2

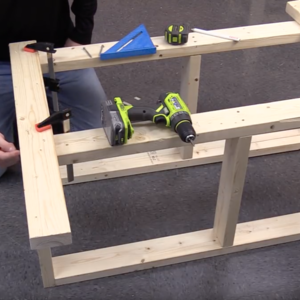
In this step you will build the identical upper and lower box frames including the middle support pieces on each. (Helpful hint: pre-drill holes with countersink bit to avoid wood stripping) Lay out the frames to visualize how you will assemble it. Using a drill driver, fasten the two (B) on the inside of the two (A). You will use 2 screws for each side/fastening point. Once your frames are securely assembled, use the tape measure to find the center of the frame (should be at 23-7/8"), mark this spot. Pre-drill holes and then fasten (D) halfway between the two (B).
STEP 3
Now that your frames are completed, you will need to attach the table legs. Fasten the table legs (C) to the outside of the four corners of the top box frame. Mark the legs 12" from the bottom (this is where you will fasten the lower box frame to the legs). Align the bottom of the frame with your marks, and fasten.
STEP 4
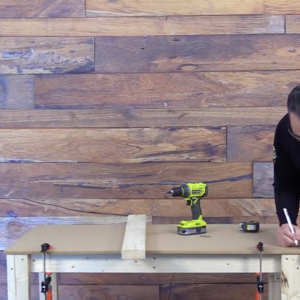
Center the sheet of MDF/Plywood on the frame. Mark the table top in 9 spots (3 on each side, and 3 down the middle) where you are going to fasten the top and pre-drill with countersink bit. Note: you can use a piece of scrap wood to help you mark the center points (as mentioned in video). Fasten the table top to frame with screws. (Helpful Hint: be sure to align your center fastener with the center support underneath the table top)
Don't forget to tag us in your DIY projects on @ryobitoolsuk