Every coffee lover needs a coffee bar! Its a place to keep mugs, sugar, coffee beans, decor and more. This shelving unit it both stylish and useful for extra storage!
For this project you will need:
Tools
Materials
- (4) 6.4mm Stainless Steel Washers
- (4) 6.4mm Hex Nuts
- (2) 6.4mm Threaded Rod (Can Be Purchased In 91.4cm Pieces)
- (4-6, Your Preference) S Hooks (For Holding Mugs)
- (2) 1X6 @ 6FT Pine Common Board
- 3.8cm Brad Nails
- Pliers
- Tape Measure
- Safety Glasses
- Pencil
- Wood Glue
- Sandpaper (For Random Orbit Sander)
- 6.4mm Wood Drilling Bit
- 19mm Forstner bit
- 19mm Forstner bit
- Paint/Stain & Brushes
- Clamps
- Speed Square
- Speed Square
STEP 1
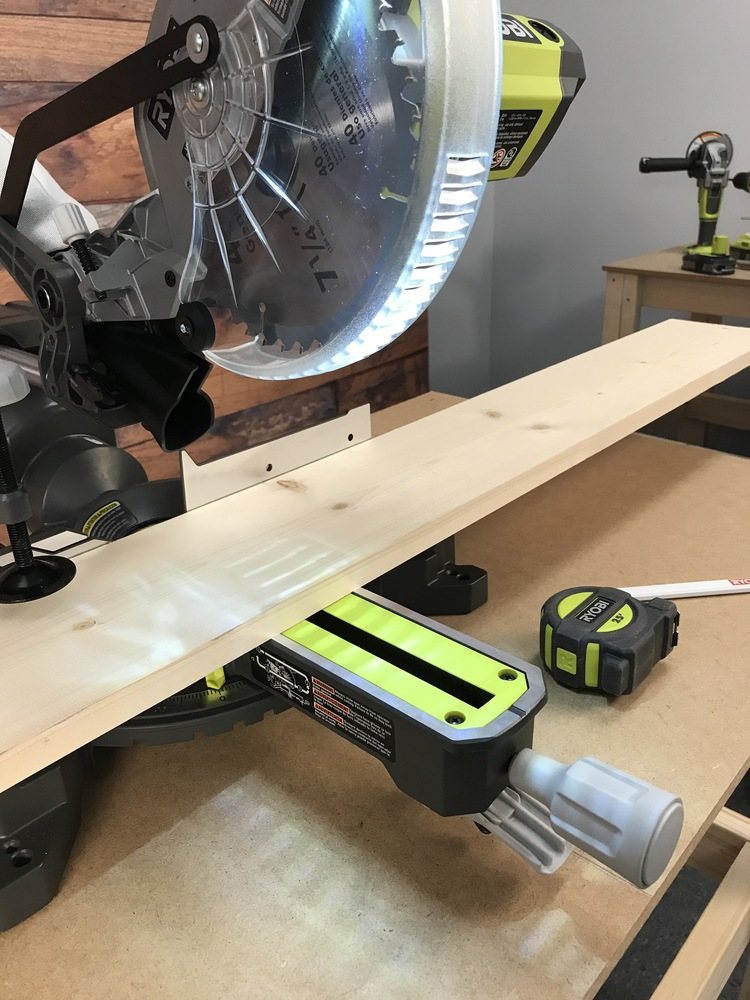
Make your cuts according to the cut list (below) with the 18V Cordless Mitre Saw.
Please note, after you make your cuts, stack your pieces to ensure they are exactly flush.
STEP 2

Cut List
(4 Pieces) 1x6 Pine @ 57.2cm
(2 Pieces) 1x6 Pine @ 45.7cm
STEP 3

Lightly sand each piece to remove any rough edges. We use the 18V Cordless Random Orbital Sander for sanding but we have many others in the range.
Please note, sanding prior to assembly will make for a better finished product.
STEP 4

Take the 2 side pieces (45.7cm boards), measure from the bottom 7.6cm and draw a line. Next, measure 13.8cm from the top and draw another line (a speed square will help). Do this on both boards.
Please note, this line will mark where the horizontal boards will be put into place.
STEP 5

Turn the boards over, put a small mark 3.8cm up from the bottom and 5.1cm from the front. Where those points intersect, mark this spot.
Please note, you will be drilling into these spots at a later step.
STEP 6

Next, put a small 1.9cm mark in from the front and 7cm down from the top of the board. Where these points intersect, mark this spot.
Please note, you will be drilling into these spots at a later step.
STEP 7

On one of the 45.7cm boards, drill a hole completely through the board at the two previously marked spots. Repeat this for the second 45.7cm board.
Please note, this is where the rod will thread through.
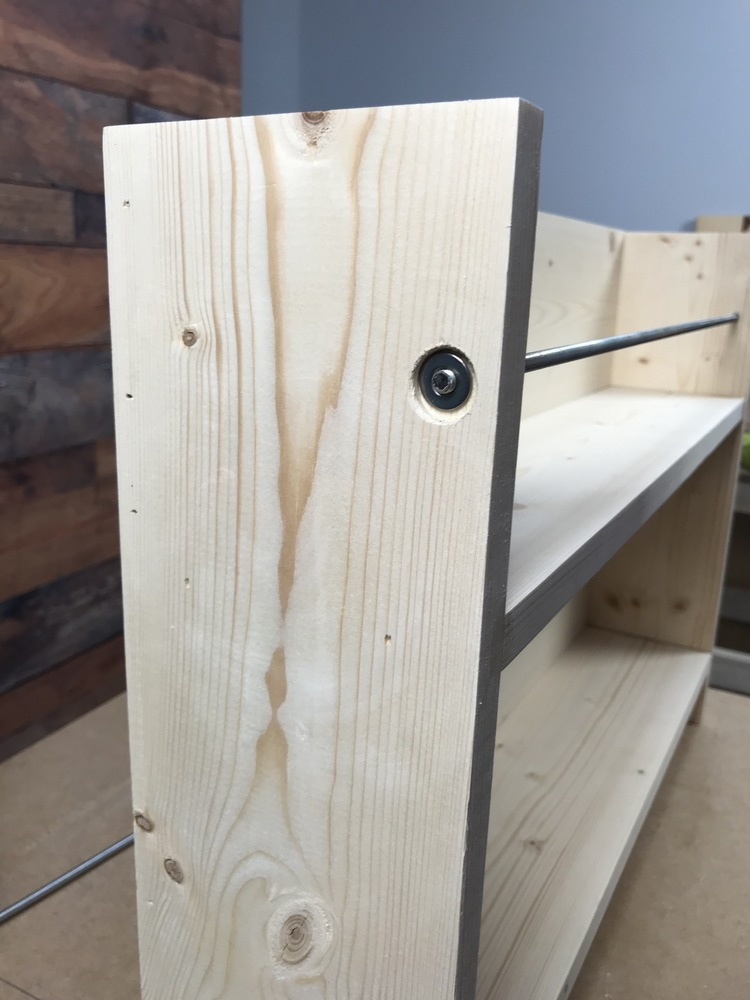
STEP 8

Now, drill over the top of the previous 4 holes with a 19mm Forstner bit halfway through the board. VERY IMPORTANT: do not drill all the way through the board.
Please note, this is to make room for the 6.4mm nut and washer.
STEP 9
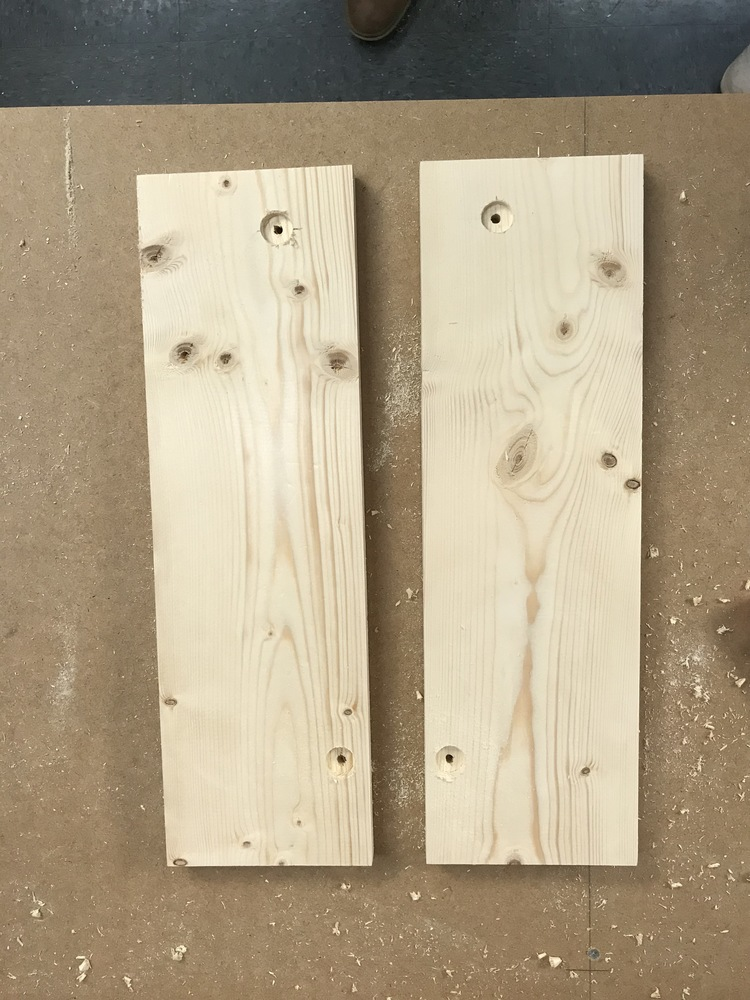
After drilling with the Forstner bit, your wood pieces should look like this image.
STEP 10
Next, locate the original lines you drew from step 4 and set the pieces up where the lines face inward towards each other. Line up the (2) horizontal shelves (57.2cm pieces) in the spaces previously marked. Make sure you place each shelf BELOW the line, not above it.
STEP 11

Add a little wood glue to the ends of the horizontal shelves and fit it into place.
STEP 12
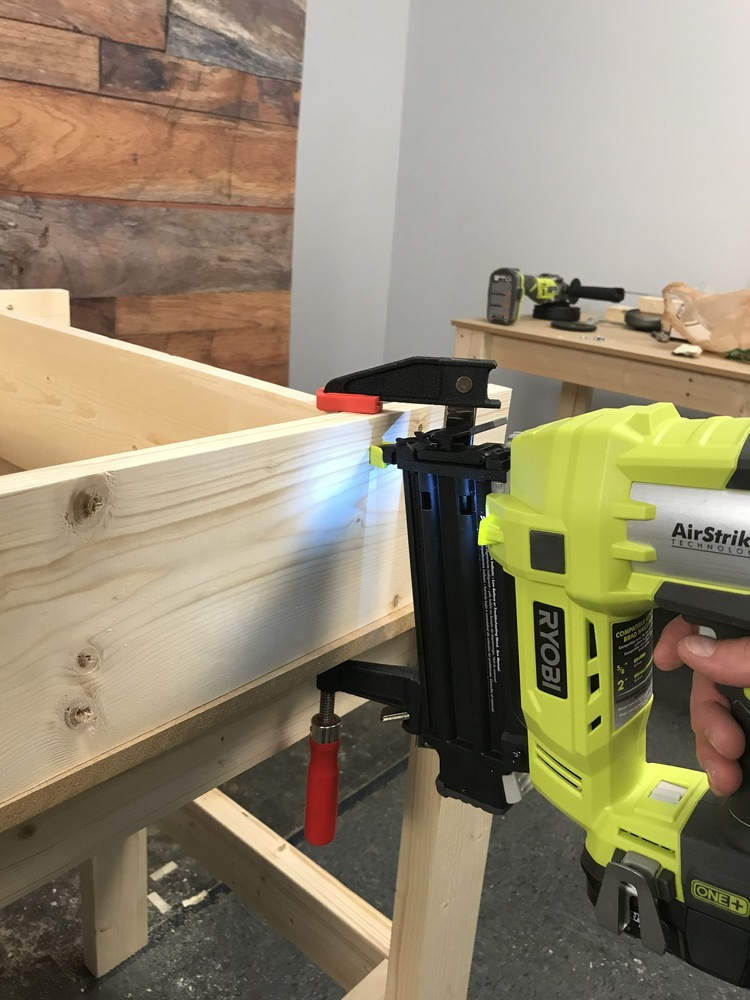
Nail into place using the 18V Cordless 18G Nailer.
Please don’t forget to use brad nails that are no smaller than 2.5cm.
STEP 13
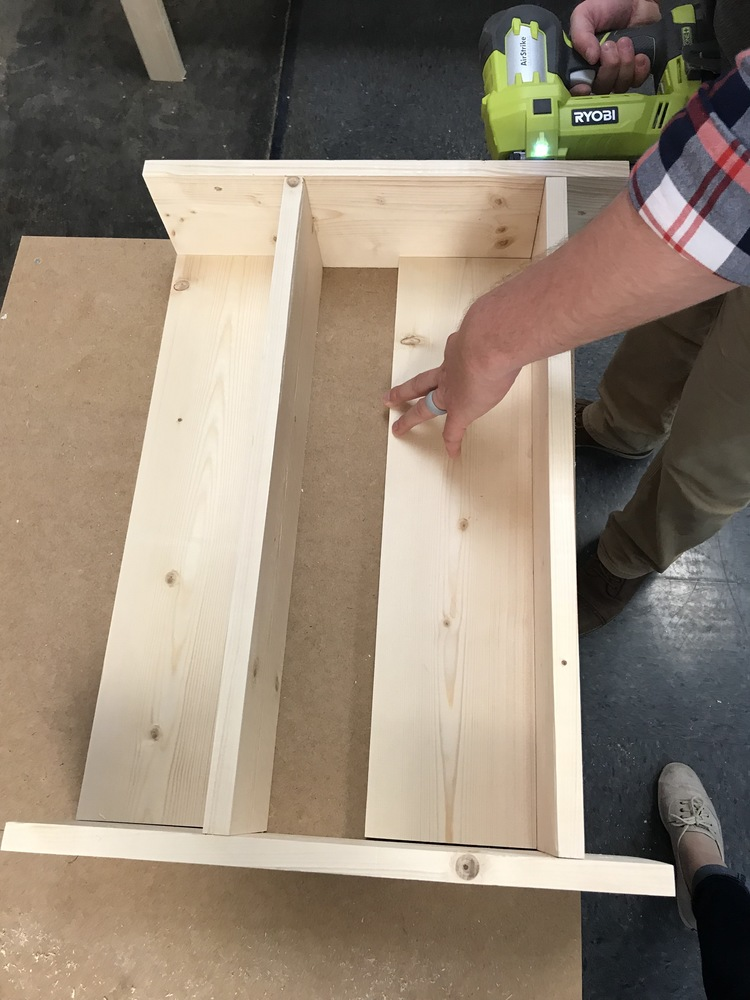
Take the remaining 57cm boards and add wood glue to sides and bottom of each. Place flush to the back, directly on top of horizontal shelves and nail into place.
Please note, start with the top piece first to make the process easier.
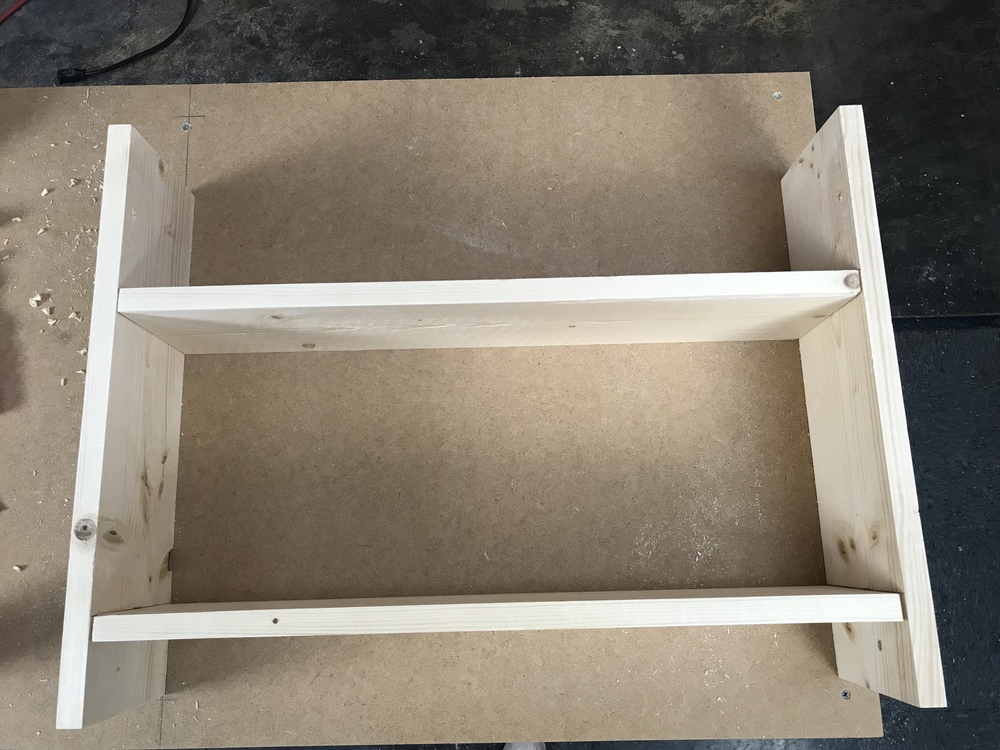
STEP 14

At this stage, your shelves should look like the image above.
STEP 15

Next, cut 6mm threaded rod, 2 pieces at 60cm each. You can make these cuts with the 18V Cordless 115mm Angle Grinder.
Please note, if you don't have these tools, your local DIY Store can make these cuts for you.
STEP 16
Insert threaded rod through the top and bottom holes and fasten a nut and washer to each end.
Please note, DO NOT over tighten.
STEP 17

Stain, paint, or finish to your preference.
STEP 18

ENJOY!
Don't forget to tag us in your DIY projects on @ryobitoolsuk