Photo credit: Créa'Theo (see on Instagram)
Project proposed and produced by: Créa'Theo

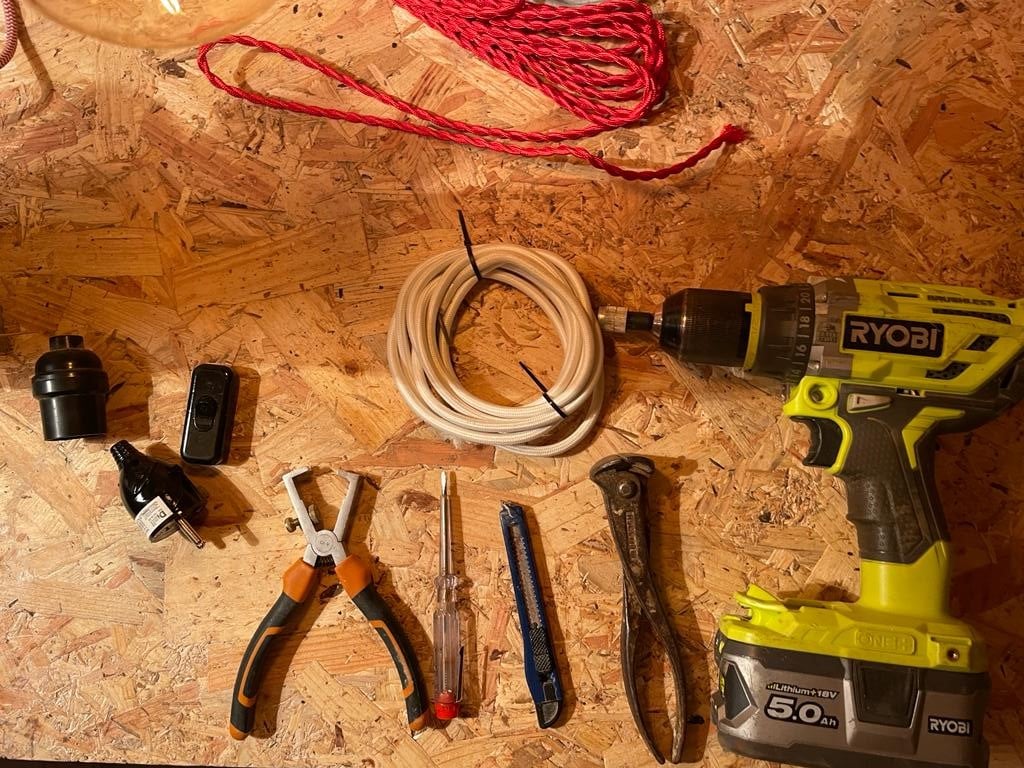
To make this creation you will need:
- Pieces of wood, driftwood
- A stone slab
- Long wood screws (minimum 70mm)
- An electric cord
- A socket
- A filament lamp
- A switch
- A male plug
- Cutting pliers
- A wire stripper
- A cutter
- An electrician's screwdriver
- A drill / screwdriver
- A concrete drill
- Small hooks

Step 1: Preparing the pieces of wood

The first step is to choose a nice, crooked piece of wood. Here we use driftwood (wood found on the beach). Salt gives a magnificent colour to the wood and it also removes residue, disease, insects and wood fungus. Making the wood healthy. On the other hand, if you recover a piece of wood from the edge of a river or a lake, I strongly advise you to apply 2 coats of xylophene, which will protect the wood from insects.
Once you find the wood you want to use, clean it up. It is then necessary to cut one end of it to obtain a flat surface in order to fix it on a support. To make the cut, I use a miter saw.
Step 2: Attaching the pieces of wood to a stone base

Once the piece has been cleaned and cut, it must be fixed on a support. It is important to use a stone base that is weighted to give the lamp stability.
For this creation I used a stone base of 15x15cm with a thickness of 3cm. If your piece of wood measures more than 50cm, I would advise you use a larger stone base, for example a 30x30cm size, which will provide more stability.
Position your piece of wood in the middle of the stone base, create marks with a pencil. Then drill 3 holes in the middle of the stone base. To do this, use a drill fitted with a concrete/stone drill bit. Once the holes have been made, take 3 wood screws with a length of between 70 and 110mm. You will pass the screws through the holes in the stone base, position the piece of wood on the stone base opposite the holes and then screw the screws one by one. Your piece of wood will now be attached to the base.
Step 3: Installation of the electrical system
First, cut a 3m piece of electrical cord, you can cut it with wire cutters or pruning shears.
Once you have the 3 meter piece, you will need to connect a socket to it at one end and an electrical outlet at the other end. It will then be necessary to cut the cable again to connect the switch. Its location is determined by the size of the lamp.
To star with, we will see together how to connect a socket.


Socket :
Start by stripping the cable using a cutter, removing 5cm.
Then strip the 2 cables over 0.8cm using a wire stripper.
Then connect the red cable (the phase) and the blue (neutral) to the socket, to do this use an electric screwdriver. Attach the red and blue to cable to the right or left of the socket, it does not matter which because it is an alternating current.
There is no need to connect the green cable (earth) because the switch and socket do not have a connection for it.
Electrical outlet (male plug):
At the other end of the cable, you will have to connect the male plug, to do this unscrew it and connect as you did for the socket.
Once these steps have been completed, you will have to start positioning the electrical cord on the lamp. Start by finding the right path so that it is aesthetic.

 I advise you to attach the cord to the piece of wood using small hooks. Once the cord is positioned and the bulb screwed to the socket, you will need to determine the correct location for the switch. Once the location has been chosen, you will cut the cord there, then connect the switch (preferably the same colour as the socket and the socket). To make this connection put the two red cables opposite each other, do the same for the blue cables (see photo below)


Once the switch has been connected, plug in the socket and admire the spectacle!
